The purpose of this exercise is to demonstrate how containers and virtual machines can work together. Additionally I also demonstrate a bit of security topic in the container world.
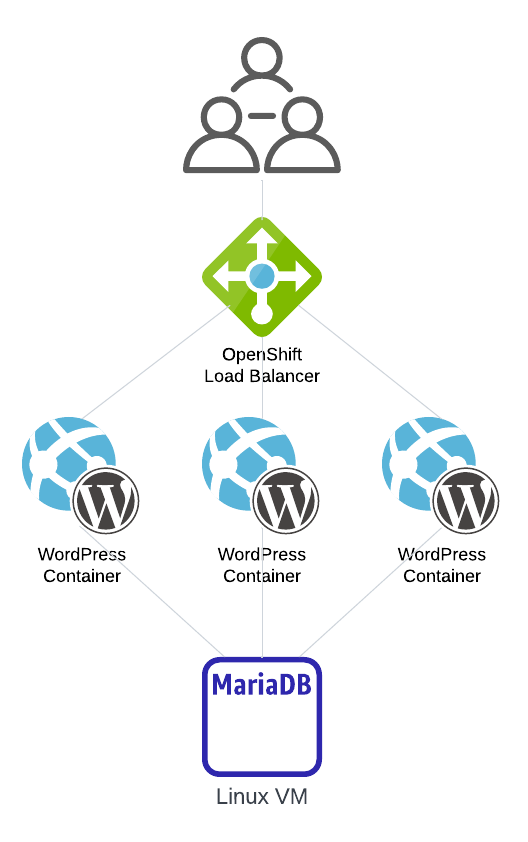
I will create a simple service which include:
- OpenShift Route / Load Balancer
- Containerised WordPress based on the official image with small modification
- Virtual machine running Linux with MariaDB as a backend for WordPress blog
To make the exercise more interesting I decided that every single step will be done in CLI. In general, depends on the task it may be convenient to use either WebUI or command line but in this case I will focus only on text console.
Requirements:
- Running OpenShift Container Platform (https://docs.openshift.com/container-platform/4.12/getting_started/openshift-overview.html)
- Installed and running OpenShift Virtualisation Operator (https://docs.openshift.com/container-platform/4.12/virt/about-virt.html)
- Installed and running OpenShift Data Foundation Operator (https://access.redhat.com/documentation/en-us/red_hat_openshift_data_foundation/4.12)
- Working end exposed internal OpenShift Image Registry (https://docs.openshift.com/container-platform/4.12/registry/securing-exposing-registry.html)
- Installed
ocandvirtctlCLI tools (https://docs.openshift.com/container-platform/4.12/cli_reference/openshift_cli/getting-started-cli.html)
Project wordpress-demo
Firstly I will create a new project called wordpress-demo where the blog application will be running:
$ oc new-project wordpress-demo
Now using project "wordpress-demo" on server "https://api.ocp4.example.com:6443".

You can add applications to this project with the 'new-app' command. For example, try:

    oc new-app rails-postgresql-example

to build a new example application in Ruby. Or use kubectl to deploy a simple Kubernetes application:

    kubectl create deployment hello-node --image=k8s.gcr.io/e2e-test-images/agnhost:2.33 -- /agnhost serve-hostname
Creating VM in OpenShift
When creating virtual machine in OpenShift using WebUI is much more convenient than CLI, but I believe knowing the both ways is the best option. I use OpenShift’s template rhel9-server-small from openshift namespace to create simple VM with RHEL9. These templates among the others come out of the box with OpenShift Virtualization operator. Please note the VM is not automatically started after creation:
$ oc process -n openshift rhel9-server-small -p NAME=wordpress-db | oc create -f -
virtualmachine.kubevirt.io/wordpress-db created

$ oc get vm
NAME           AGE   STATUS    READY
wordpress-db   25s   Stopped   False

$ virtctl start wordpress-db
VM wordpress-db was scheduled to start

$ oc get vm,vmi
NAME                                      AGE   STATUS    READY
virtualmachine.kubevirt.io/wordpress-db   70s   Running   True

NAME                                              AGE   PHASE     IP             NODENAME   READY
virtualmachineinstance.kubevirt.io/wordpress-db   28s   Running   10.129.1.104   master-1   True
Virtual machine user credentials
Because I didn’t specify CLOUD_USER_PASSWORD parameter while processing the template and creating the VM, cloud_user password has been automatically generated for me. I could retrieve it in various ways but this time I want to challenge myself and do everything in CLI, therefore I ran the following command to get it from the VM resource:
$ oc get vm wordpress-db -o json  | jq -r '.spec.template.spec.volumes[] | select(.name | contains("cloudinitdisk")) | .cloudInitNoCloud.userData'
#cloud-config
user: cloud-user
password: maa1-4jpj-6m77
chpasswd: { expire: False }
Connecting to the VM
To get access to the VM console I use virtctl CLI tool and credentials from the above. Once I got in I enabled password authentication for sshd and restarted it so I can ssh to the VM directly:
$ virtctl console wordpress-db
Successfully connected to wordpress-db console. The escape sequence is ^]

wordpress-db login: cloud-user
Password:
[cloud-user@wordpress-db ~]$ sudo su

[root@wordpress-db ~]# sed -i 's/^PasswordAuthentication no//g' /etc/ssh/sshd_config

[root@wordpress-db ~]# systemctl restart sshd
But… wait a moment! How am I supposed to ssh there?
Since VM in OpenShift Virtualisation is running in a container it inherits network attachments too. I don’t have any extra networks defined here so I will use NodePort service type in order to get connected to the VM. virtctl tool is very handy to create it for a virtual machine:
$ virtctl expose vm wordpress-db --port=22 --name=wordpress-db-ssh --type=NodePort
Service wordpress-db-ssh successfully exposed for vm wordpress-db
Since I use a NodePort, OpenShift creates for me random port forwarding rule on all the nodes running in the cluster to let me access the VM. The random port number can be retrieved from service definition:
$ oc get svc wordpress-db-ssh
NAME               TYPE       CLUSTER-IP      EXTERNAL-IP   PORT(S)        AGE
wordpress-db-ssh   NodePort   172.30.31.216   <none>        22:32163/TCP   3m5s
or in a bit more fancy way:
$ oc get svc wordpress-db-ssh -o json | jq '.spec.ports[] | select(.port | contains(22)).nodePort'
32163
Now I need the IP address to connect to. Since this is NodePort type service we can connect to any of the nodes in the cluster and the connection will be redirected through default cluster network to the VM. Let’s get the IPs of all nodes:
$ oc get nodes -o custom-columns=NODE:.metadata.name,IP:.status.addresses[].address
NODE       IP
master-1   192.168.232.123
master-2   192.168.232.124
master-3   192.168.232.122
With IP address and port number I can finally get access to the VM:
$ ssh cloud-user@192.168.232.123 -p 32163
cloud-user@192.168.232.123's password:
Register this system with Red Hat Insights: insights-client --register
Create an account or view all your systems at https://red.ht/insights-dashboard
[cloud-user@wordpress-db ~]$
Because it is just another virtual machine running under QEMU-KVM, there is nothing really new for those familiar with virtualisation. Let’s get it registered with Red Hat and install MariaDB on it, preferably this should be done with some sort of automation but that’s not the aim for this practice.
[cloud-user@wordpress-db ~]$ sudo subscription-manager register --org <<ORG_ID>> --activationkey <<KEY>>
The system has been registered with ID: aaa-eee-ffff-ccc
The registered system name is: wordpress-db
Installed Product Current Status:
Product Name: Red Hat Enterprise Linux for x86_64
Status:       Subscribed

[cloud-user@wordpress-db ~]$ sudo dnf install -y mariadb-server
Updating Subscription Management repositories.
Red Hat Enterprise Linux 9 for x86_64 - AppStream (RPMs)                                                                              9.4 MB/s |  21 MB     00:02
Red Hat Enterprise Linux 9 for x86_64 - BaseOS (RPMs)
(...)
Complete!

[cloud-user@wordpress-db ~]$ sudo systemctl enable --now mariadb
Created symlink /etc/systemd/system/mysql.service → /usr/lib/systemd/system/mariadb.service.
Created symlink /etc/systemd/system/mysqld.service → /usr/lib/systemd/system/mariadb.service.
Created symlink /etc/systemd/system/multi-user.target.wants/mariadb.service → /usr/lib/systemd/system/mariadb.service.
Create a database and a user wordpress_user with password wordpress_password. Please write down that somewhere as it will be needed when configuring WordPress.
[cloud-user@wordpress-db ~]$ echo "create database wordpress; grant all on wordpress.* to 'wordpress_user'@'%' identified by 'wordpress_password'; flush privileges;" | sudo mysqlThe last thing I still need to do is exposing MariaDB port so pods (containers) can access it. Again I will use virtctl CLI. Please note missing --type=NodePort parameter. This is because the default type (ClusterIP) is enough as we don’t expect – at least now – to have a need to connect to MariaDB from outside the cluster.
$ virtctl expose vm wordpress-db --port=3306 --name=wordpress-db-mariadb
Service wordpress-db-mariadb successfully exposed for vm wordpress-db

$ oc describe svc wordpress-db-mariadb
Name:              wordpress-db-mariadb
Namespace:         wordpress-demo
Labels:            <none>
Annotations:       <none>
Selector:          kubevirt.io/domain=wordpress-db,kubevirt.io/size=small
Type:              ClusterIP
IP Family Policy:  SingleStack
IP Families:       IPv4
IP:                172.30.106.220
IPs:               172.30.106.220
Port:              <unset>  3306/TCP
TargetPort:        3306/TCP
Endpoints:         10.129.1.104:3306
Session Affinity:  None
Events:            <none>
The virtual machine is ready now, let’s do some containerisation work.
Containers – original WordPress image
WordPress provides official Docker image available at https://hub.docker.com/_/wordpress to speedup the process a bit. It contains integration making running it in a container straightforward but… let me show you.
I created a deploymend using oc new-app command as bellow:
$ oc new-app --image=docker.io/wordpress:php8.2-apache --name=wordpress-frontend -e WORDPRESS_DB_HOST=wordpress-db-mariadb -e WORDPRESS_DB_USER=wordpress_user -e WORDPRESS_DB_PASSWORD=wordpress_password -e WORDPRESS_DB_NAME=wordpress
--> Found container image 5835e3b (32 hours old) from docker.io for "docker.io/wordpress:php8.2-apache"

    * An image stream tag will be created as "wordpress-frontend:php8.2-apache" that will track this image

--> Creating resources ...
    imagestream.image.openshift.io "wordpress-frontend" created
Warning: would violate PodSecurity "restricted:v1.24": allowPrivilegeEscalation != false (container "wordpress-frontend" must set securityContext.allowPrivilegeEscalation=false), unrestricted capabilities (container "wordpress-frontend" must set securityContext.capabilities.drop=["ALL"]), runAsNonRoot != true (pod or container "wordpress-frontend" must set securityContext.runAsNonRoot=true), seccompProfile (pod or container "wordpress-frontend" must set securityContext.seccompProfile.type to "RuntimeDefault" or "Localhost")
    deployment.apps "wordpress-frontend" created
    service "wordpress-frontend" created
--> Success
    Application is not exposed. You can expose services to the outside world by executing one or more of the commands below:
     'oc expose service/wordpress-frontend'
    Run 'oc status' to view your app.
So far so good, let me check the app status as the command above suggest:
$ oc status
In project wordpress-demo on server https://api.ocp4.example.com:6443

svc/wordpress-db-ssh (all nodes):32163 -> 22
svc/wordpress-db-mariadb - 172.30.106.220:3306
  pod/virt-launcher-wordpress-db-75b8w runs registry.redhat.io/container-native-virtualization/virt-launcher@sha256:1ee29ef3f8b117bef13ba4325b597da99b55a1acb5f2e9eabe11937e9314fe73

svc/wordpress-frontend - 172.30.78.10:80
  deployment/wordpress-frontend deploys istag/wordpress-frontend:php8.2-apache
    deployment #2 running for about a minute - 0/1 pods (warning: 3 restarts)
    deployment #1 deployed about a minute ago

Errors:
  * pod/wordpress-frontend-5d467d8899-wn8v9 is crash-looping

1 error, 1 info identified, use 'oc status --suggest' to see details.
Ooops! The pod is crash-looping what indicates successful download/import to the cluster but while running it fails for some unknown yet reason. Let’s see what OpenShift would suggest me to do:
$ oc status --suggest
(...)
Errors:
  * pod/wordpress-frontend-5d467d8899-wn8v9 is crash-looping

    The container is starting and exiting repeatedly. This usually means the container is unable
    to start, misconfigured, or limited by security restrictions. Check the container logs with

      oc logs wordpress-frontend-5d467d8899-wn8v9 -c wordpress-frontend

    Current security policy prevents your containers from being run as the root user. Some images
    may fail expecting to be able to change ownership or permissions on directories. Your admin
    can grant you access to run containers that need to run as the root user with this command:

      oc adm policy add-scc-to-user anyuid -n wordpress-demo -z default
(...)
Ok that may be the case. I don’t like the advice though to level up privileges. Let’s investigate it further and check for any output logs on the container:
$ oc logs wordpress-frontend-5d467d8899-wn8v9 -c wordpress-frontend
AH00558: apache2: Could not reliably determine the server's fully qualified domain name, using 10.129.1.49. Set the 'ServerName' directive globally to suppress this message
(13)Permission denied: AH00072: make_sock: could not bind to address [::]:80
(13)Permission denied: AH00072: make_sock: could not bind to address 0.0.0.0:80
no listening sockets available, shutting down
AH00015: Unable to open logs
Gotcha! As you can see, the wordpress image wants to bind to port 80/tcp for what it would require extra privileges. This isn’t something what I’d like to have running on my cluster due to the obvious security concerns. Therefore I will slightly modify the original docker image and adapt it for being used on OpenShift. Simultaneously I will increase its security level too! 😉
Containers – custom WordPress image
Firstly let’s clean up the failed deployment to ensure it won’t interfere in any way with the later one.
$ oc delete all -l app=wordpress-frontend
service "wordpress-frontend" deleted
deployment.apps "wordpress-frontend" deleted
imagestream.image.openshift.io "wordpress-frontend" deleted
Because container images are layered, I can use the original image – docker.io/wordpress:php8.2-apache – and apply some changes to it to produce new, custom one. I’ve quickly reviewed what’s inside the original image and how its original Dockerfile looks like. This brought me to the conclusion that the following simple Containerfile will fix the issue and let me run WordPress container as unprivileged. I use podman instead of docker, hence I use Containerfile in place of Dockerfile, the syntax is the same:
$ cat << EOF > Containerfile
FROM docker.io/wordpress:php8.2-apache

RUN sed -i 's/^Listen\ 80$/Listen\ 8080/' /etc/apache2/ports.conf

EXPOSE 8080
ENTRYPOINT ["/usr/local/bin/docker-entrypoint.sh"]
CMD ["apache2-foreground"]
EOF
Now I will build and tag the image. I’m using my OpenShift’s internal registry route which let me upload images from outside the cluster:
$ podman build -t default-route-openshift-image-registry.apps.ocp4.example.com/wordpress-demo/wordpress .
STEP 1/5: FROM docker.io/wordpress:php8.2-apache
STEP 2/5: RUN sed -i 's/^Listen\ 80$/Listen\ 8080/' /etc/apache2/ports.conf
--> c511c5645d3
STEP 3/5: EXPOSE 8080
--> 3a27ae7062a
STEP 4/5: ENTRYPOINT ["/usr/local/bin/docker-entrypoint.sh"]
--> d75fd350f4a
STEP 5/5: CMD ["apache2-foreground"]
COMMIT default-route-openshift-image-registry.apps.ocp4.example.com/wordpress-demo/wordpress
--> 945945a1c24
Successfully tagged default-route-openshift-image-registry.apps.ocp4.example.com/wordpress-demo/wordpress:latest
945945a1c24a9e8620d33c2eca01a98e1d796911868536dcf32c9ac92843e3cc
How to configure external access for OpenShift internal image registry you can find in this document: https://docs.openshift.com/container-platform/4.12/registry/securing-exposing-registry.html
Time to push the image to the registry:
$ podman push default-route-openshift-image-registry.apps.ocp4.example.com/wordpress-demo/wordpress
Getting image source signatures
(...)
Copying blob f675495821b9 done
(...)
Copying config 945945a1c2 done
Writing manifest to image destination
Storing signatures
And create ImageStream pointing to that image. To learn more about ImageStreams please see Managing image streams chapter in Red Hat’s OpenShift documentation.
$ oc tag image-registry.openshift-image-registry.svc.cluster.local/wordpress-demo/wordpress:latest wordpress-demo/wordpress:latest
Tag wordpress:latest set to image-registry.openshift-image-registry.svc.cluster.local/wordpress-demo/wordpress:latest
Now I can again create wordpress-frontend deployment using oc new-app command, this time using my own customised wordpress image (through the ImageStream).
$ oc new-app --image-stream=wordpress:latest --name=wordpress-frontend -e WORDPRESS_DB_HOST=wordpress-db-mariadb -e WORDPRESS_DB_USER=wordpress_user -e WORDPRESS_DB_PASSWORD=wordpress_password -e WORDPRESS_DB_NAME=wordpress
--> Found image 945945a (5 minutes old) in image stream "wordpress-demo/wordpress" under tag "latest" for "wordpress:latest"


--> Creating resources ...
Warning: would violate PodSecurity "restricted:v1.24": allowPrivilegeEscalation != false (container "wordpress" must set securityContext.allowPrivilegeEscalation=false), unrestricted capabilities (container "wordpress" must set securityContext.capabilities.drop=["ALL"]), runAsNonRoot != true (pod or container "wordpress" must set securityContext.runAsNonRoot=true), seccompProfile (pod or container "wordpress" must set securityContext.seccompProfile.type to "RuntimeDefault" or "Localhost")
    deployment.apps "wordpress-frontend" created
    service "wordpress-frontend" created
--> Success
    Application is not exposed. You can expose services to the outside world by executing one or more of the commands below:
     'oc expose service/wordpress-frontend'
    Run 'oc status' to view your app.
Let’s verify the status as the output above suggests
$ oc status
In project wordpress-demo on server https://api.ocp4.example.com:6443

svc/wordpress-db-ssh (all nodes):32163 -> 22
svc/wordpress-db-mariadb - 172.30.106.220:3306
  pod/virt-launcher-wordpress-db-75b8w runs registry.redhat.io/container-native-virtualization/virt-launcher@sha256:1ee29ef3f8b117bef13ba4325b597da99b55a1acb5f2e9eabe11937e9314fe73

svc/wordpress-frontend - 172.30.85.119 ports 80, 8080
  deployment/wordpress-frontend deploys istag/wordpress:latest
    deployment #1 running for 5 minutes - 1 pod (warning: 1 restarts)

1 warning, 1 info identified, use 'oc status --suggest' to see details.
Let’s ignore the warning right now and take a look at the output from the pod.
$ oc logs deployment/wordpress-frontend
No 'wp-config.php' found in /var/www/html, but 'WORDPRESS_...' variables supplied; copying 'wp-config-docker.php' (WORDPRESS_DB_HOST WORDPRESS_DB_MARIADB_PORT (...)
WORDPRESS_FRONTEND_SERVICE_PORT_80_TCP)
AH00558: apache2: Could not reliably determine the server's fully qualified domain name, using 10.129.1.170. Set the 'ServerName' directive globally to suppress this message
AH00558: apache2: Could not reliably determine the server's fully qualified domain name, using 10.129.1.170. Set the 'ServerName' directive globally to suppress this message
[Thu May 18 10:51:30.465311 2023] [mpm_prefork:notice] [pid 1] AH00163: Apache/2.4.56 (Debian) PHP/8.2.6 configured -- resuming normal operations
[Thu May 18 10:51:30.465362 2023] [core:notice] [pid 1] AH00094: Command line: 'apache2 -D FOREGROUND'
It looks much better. No more errors related to attempt to bind to port 80/tcp.
Adding persistent shared storage volume
Out of the box the deployment is configured to use an ephemeral EmptyDir volume for /var/www/html. You can confirm it by running the following command:
$ oc describe deployment wordpress
(...)
    Mounts:
      /var/www/html from wordpress-volume-1 (rw)
  Volumes:
   wordpress-volume-1:
    Type:       EmptyDir (a temporary directory that shares a pod's lifetime)
(...)
Since we have OpenShift Data Foundation installed we can utilise it in order to provide persistent and shared storage across multiple instances of wordpress frontend container:
$ oc set volume deployment/wordpress-frontend --add --name wordpress-volume-1 -m /var/www/html -t pvc --claim-size 1Gi --claim-class ocs-storagecluster-cephfs --claim-mode ReadWriteMany --overwrite
deployment.apps/wordpress-frontend volume updated
Just to confirm it has been configured as expected I again run oc describe deployment command:
$ oc describe deployment wordpress
(...)
    Mounts:
      /var/www/html from wordpress-volume-1 (rw)
  Volumes:
   wordpress-volume-1:
    Type:       PersistentVolumeClaim (a reference to a PersistentVolumeClaim in the same namespace)
    ClaimName:  pvc-ztrk6
    ReadOnly:   false
(...)
Accessing running WordPress instance
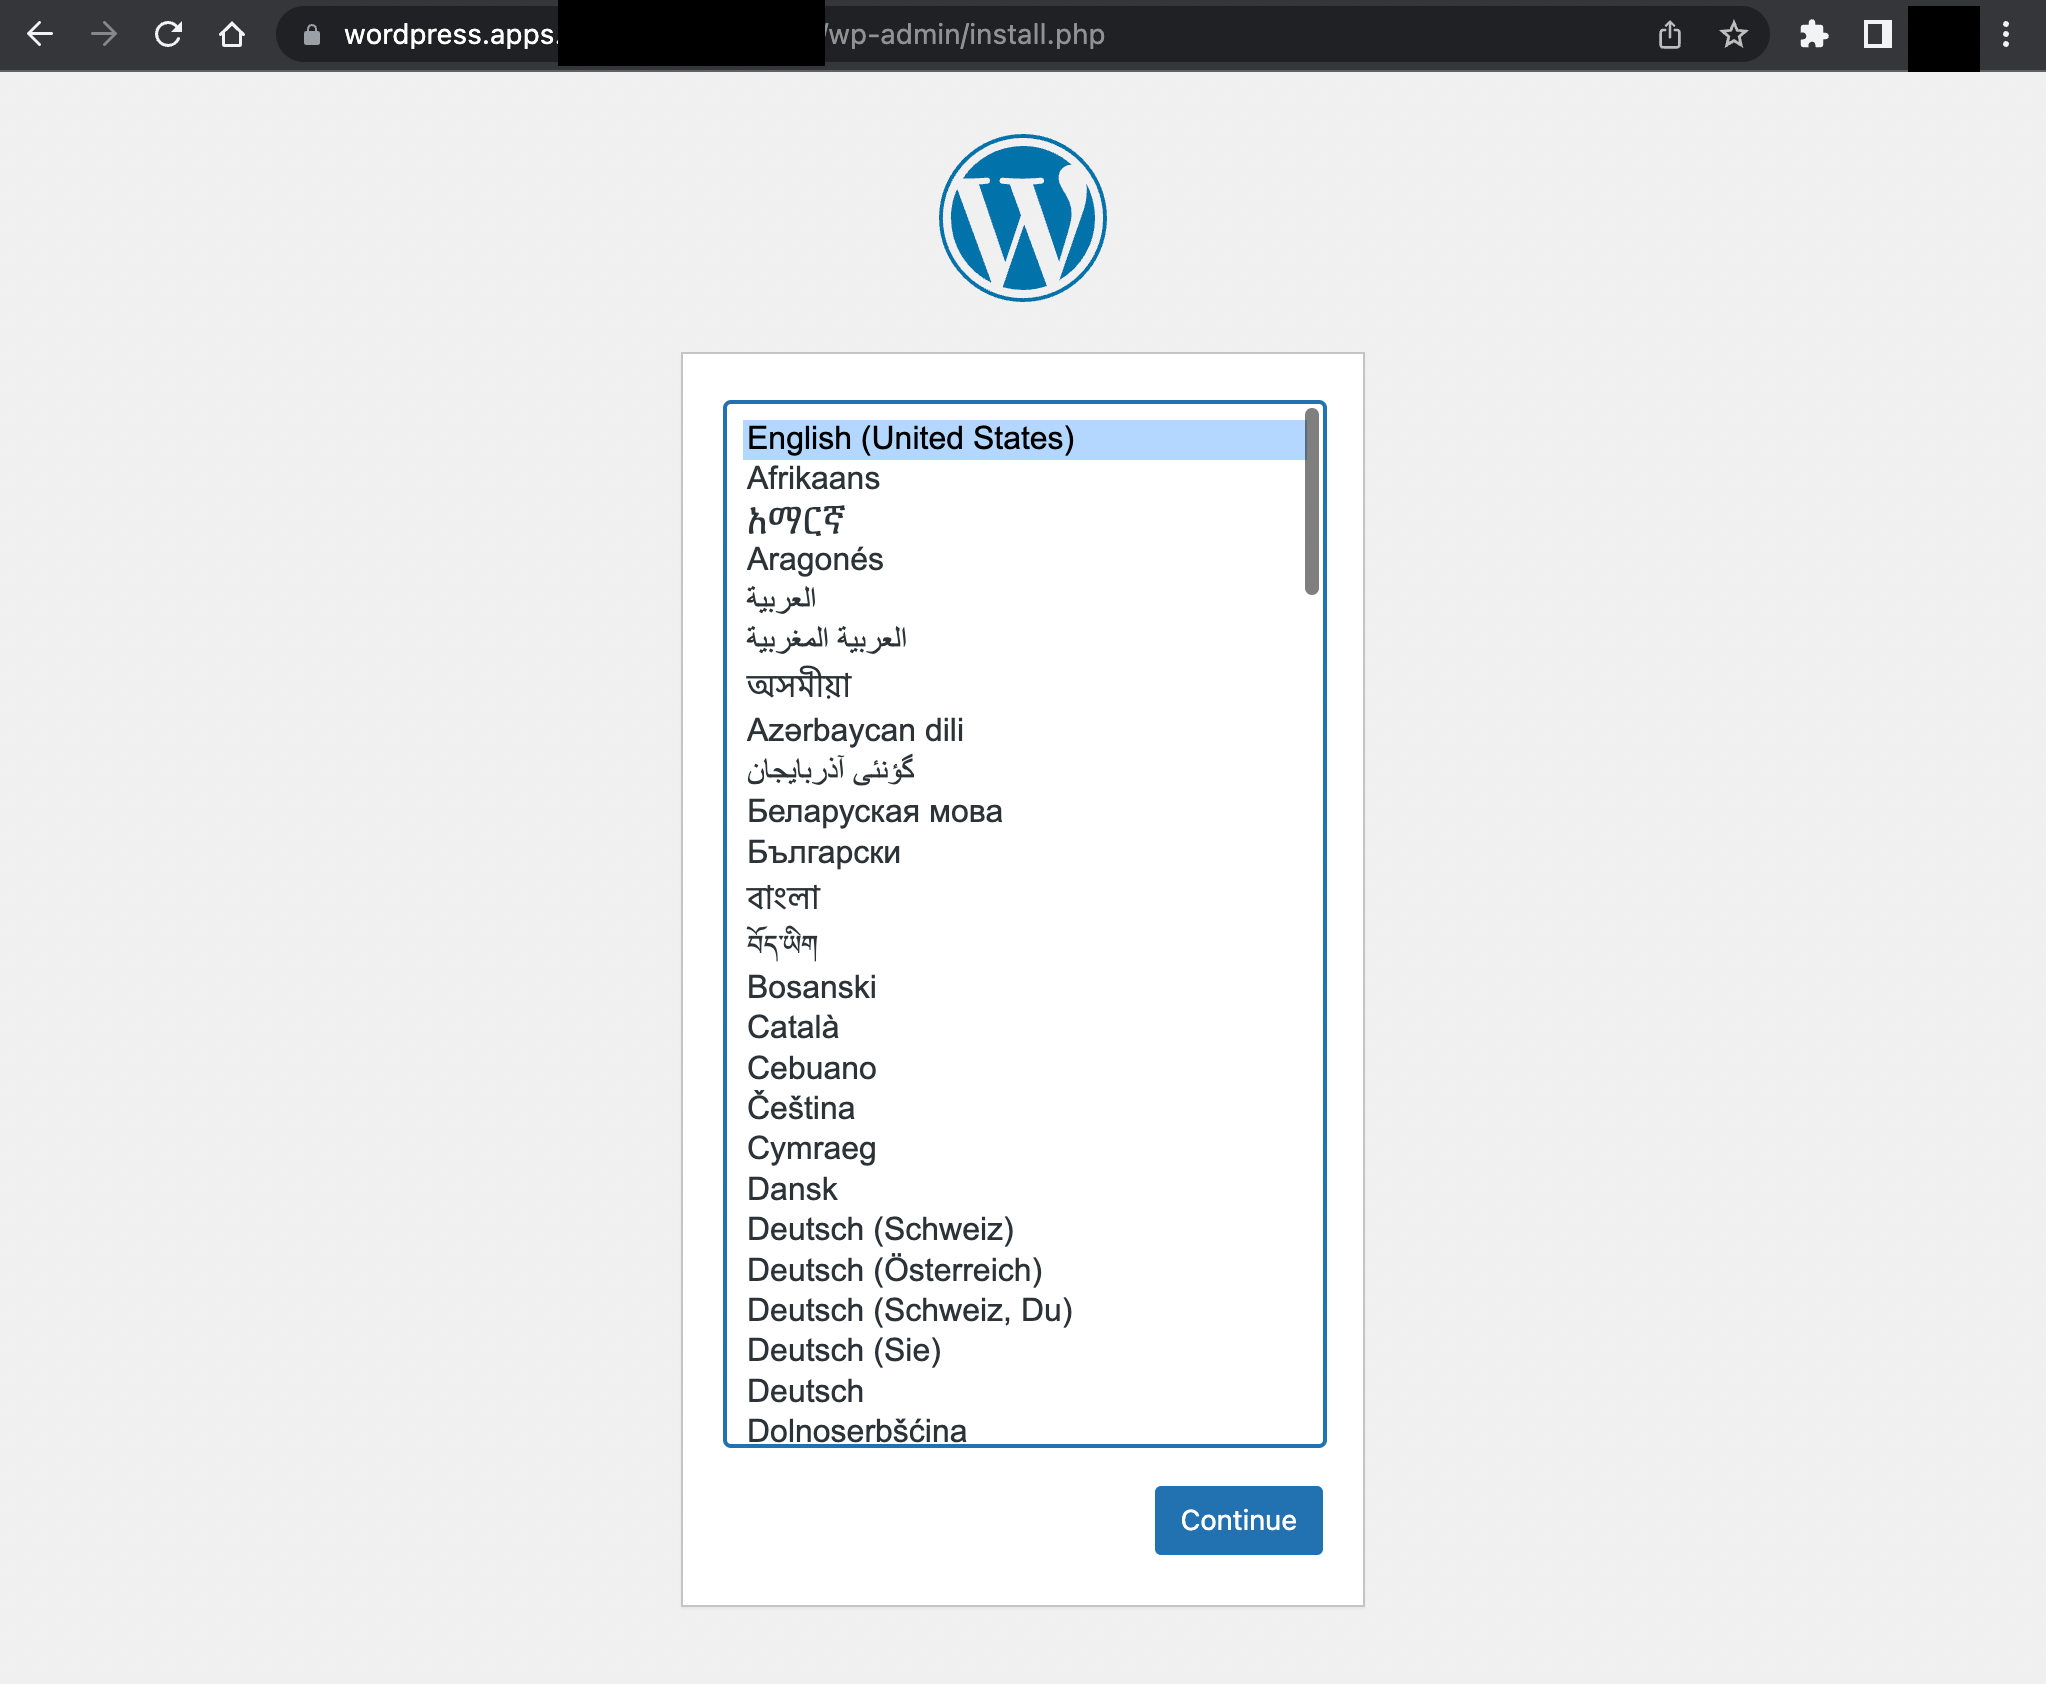
In order to access the application from outside the cluster, I need to expose it to the external world by creating a route and pointing it to the right service port. Therefore I run the following command to get route with SSL termination provided by the OpenShift:
$ oc create route edge --service=wordpress-frontend --port=8080-tcp --hostname=wordpress.apps.ocp4.example.com
route.route.openshift.io/wordpress-frontend created
The app should be available now via https://wordpress.apps.ocp4.example.com
Scaling wordpress frontend containers
In order to scale out wordpress-frontend pods you can simply run:
oc scale deployment wordpress-frontend --replicas=3
deployment.apps/wordpress-frontend scaled
$ oc get pods
NAME                                READY   STATUS    RESTARTS       AGE
virt-launcher-wordpress-db-75b8w    1/1     Running   0              25h
wordpress-frontend-cd5595d4-gbzmf   1/1     Running   1 (107s ago)   109s
wordpress-frontend-cd5595d4-smcsg   1/1     Running   1 (2m ago)     2m3s
wordpress-frontend-cd5595d4-zqzd2   1/1     Running   1 (106s ago)   109s
TODO
- Provide MariaDB configuration parameters through Secret instead of deployment variables
- Configure Liveness and Readiness checks
- Configure Network Policies