The purpose of this document is to explain how Red Hat OpenShift Container Platform with Virtualization could be used to practice and demo RHEL for Edge use-cases.
This particular example is built on the top of Single Node OpenShift deployment, however it should run on any regular OpenShift Container Platform with OpenShift Virtualization enabled as well.
The setup consist of:
- podNetwork – this is the default network where pods running on OpenShift are connected to
- br–edge – local bridge simulating edge network which edge devices are using to bootstrap from
- edge-helper – an VM where supporting services are running, including image-builder, dnsmasq(dhcp, tftp), nginx, nftables(masquerade)
- RHEL for EDGE container – a pod with a single container providing repository needed to provision edge-server
- edge-servers – a set of VMs simulating edge-devices which we provision using RHEL for EDGE
All running on the top of Red Hat OpenShift Container Platform.

Requirements
Before we start let’s establish what the requirements and assumptions are. You will need:
- Red Hat OpenShift Container Platform with Virtualization support enabled
- it can be Single Node OpenShift (SNO) deployment – even virtualized
- multi-node deployments need extra care for network and storage configurations to ensure connectivity between the elements and storage persistence
- Subscriptions
- Red Hat OpenShift subscription covering all the nodes being used (for SNO you need only one 🙂 )
- Red Hat Enterprise Linux subscription for edge-helper VM
- Persistent storage
- for SNO scenario, storage provided by local-storage operator is sufficient
- for multi-node scenarios, the best is to use Red Hat OpenShift Data Foundation
- Internet access – so we can register our VM and download required packages from Red Hat’s CDN
Installation
edge-lab project
All the activities you will perform will happen within a single project. For the purpose of this document I create and use edge-lab project.
[rafal@host ~]$ oc new-project edge-labEdge network bridge – br-edge
In order to simulate an edge-network, internal dummy bridge br-edge is being used in this scenario. The bridge does not have external connectivity so it works only for either Single Node OpenShift or for multi-node scenarios as long as all workloads will run on that single node.
For multi-node deployments where multiple nodes are being used you must use bridge connected to real NIC which provides communication between nodes being used.
Please see Understanding multiple networks document for more details.
[rafal@host ~]$ cat << EOF | oc create -n edge-lab -f -
apiVersion: k8s.cni.cncf.io/v1
kind: NetworkAttachmentDefinition
metadata:
  name: br-edge
spec:
  config: |-
    {
      "cniVersion": "0.3.1",
      "name": "br-edge",
      "type": "bridge"
    }
EOF
Preparation of edge-helper virtual machine
This virtual machine will be used for us for:
- image-builder – the tool to configure, build and export image of RHEL for Edge servers
- dhcp server – for edge network where servers will be booted from
- router with SNAT/Masquerade – to allow access from edge network to the external world (including OpenShift routes)
- tftp server – to facilitate network boot
- nginx server – to provide ISO image, kickstart and other files required to boot the servers
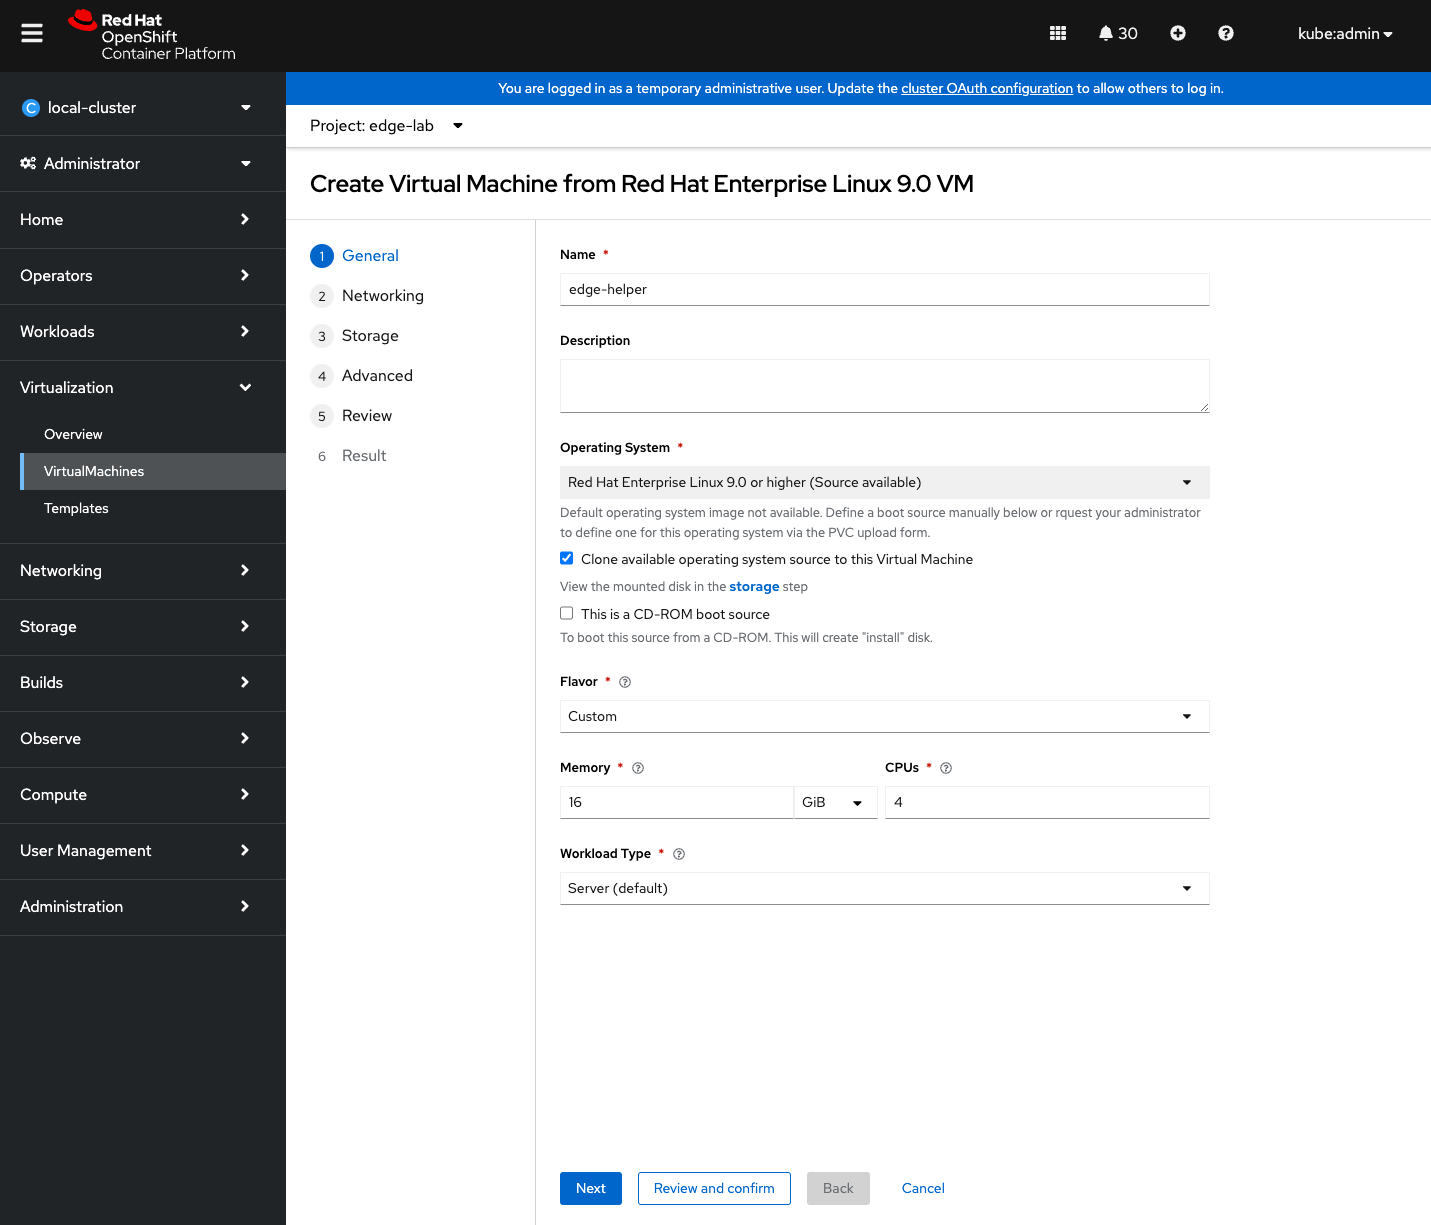
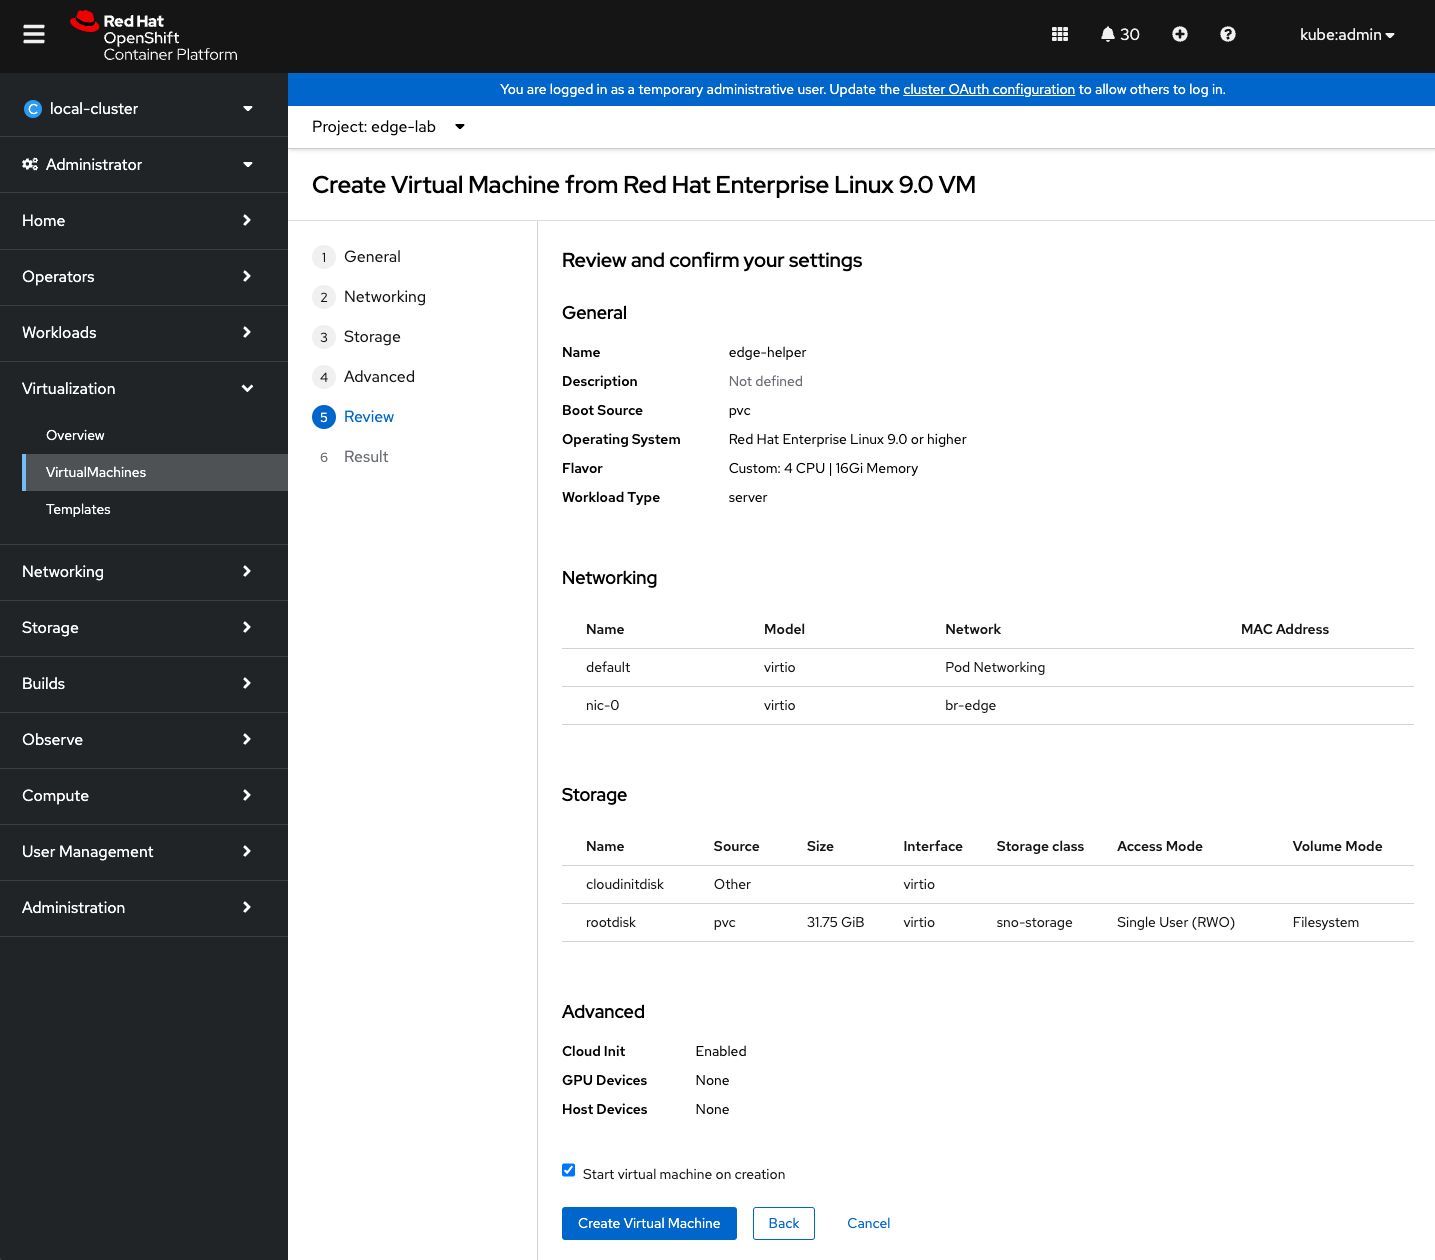
To create the VM please go to Virtualization -> Templates -> Find “Red Hat Enterprise Linux 9.X VM” template and click “Create VM“.
Fill the form (name of the VM), use the biggest VM flavor possible since image-builder requires extra resources.
Expand “Authorized key” to add your ssh public key, check “Expose SSH access to this virtual machine” box.
Now click “Customize virtual machine” button to custom it in more detail.
In General tab confirm the size of the VM or alternatively specify custom CPU and memory allocation. The bigger the better 😉
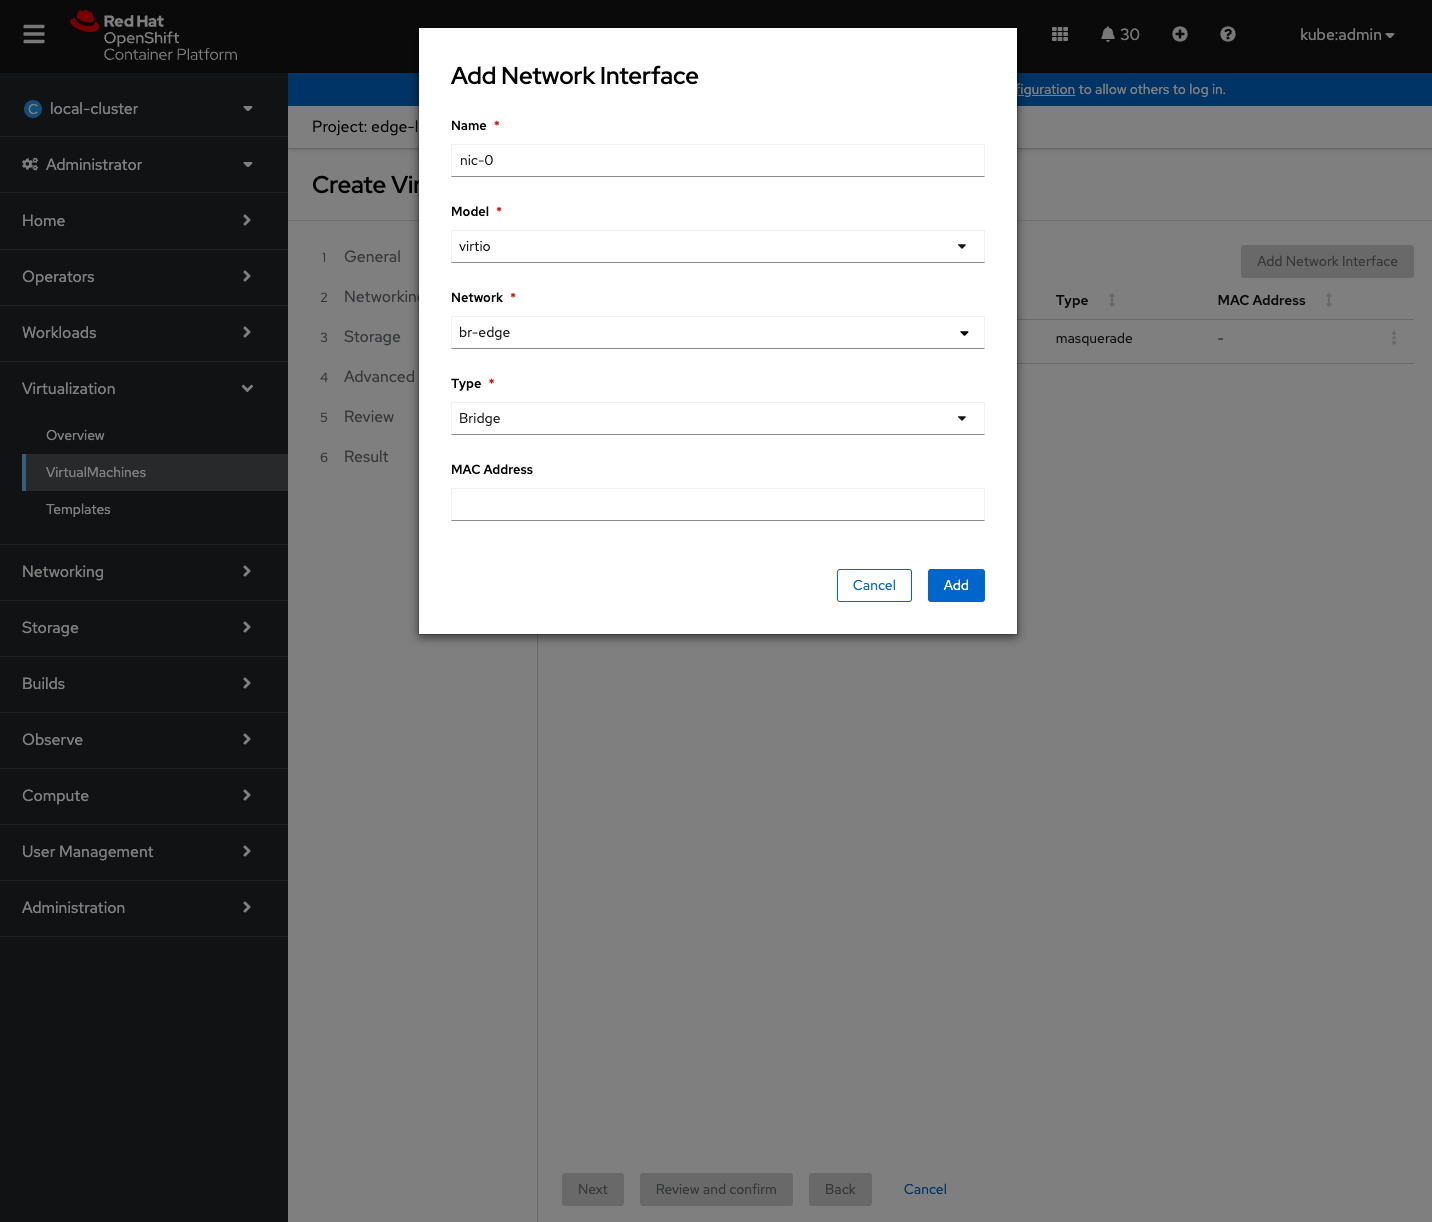
In the Networking tab, add extra network interface provided by Multus – you’ve created it earlier – with the following specification:
- Name: nic-0
- Model: virtio
- Network: br-edge
- Type: Bridge
- MAC Address: leave it blank
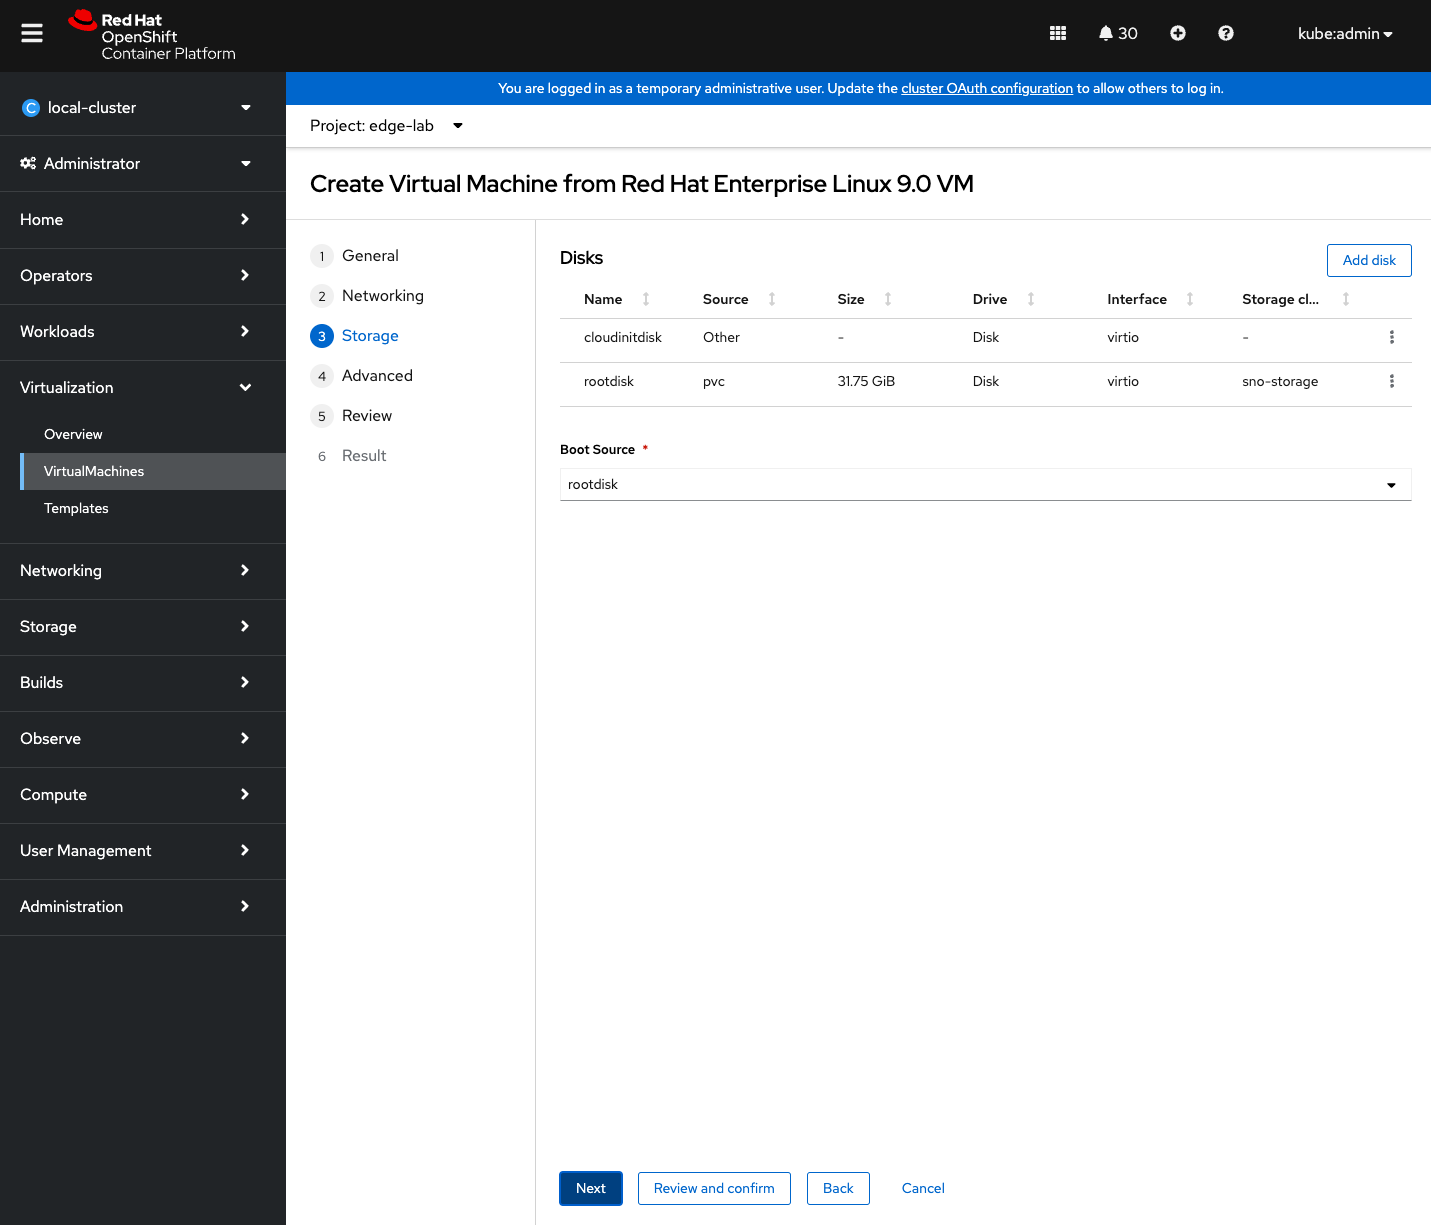
Ensure “rootdisk” in “Storage” section is using persistent storage – in my case with SNO being used, it is sno-storage StorageClass.
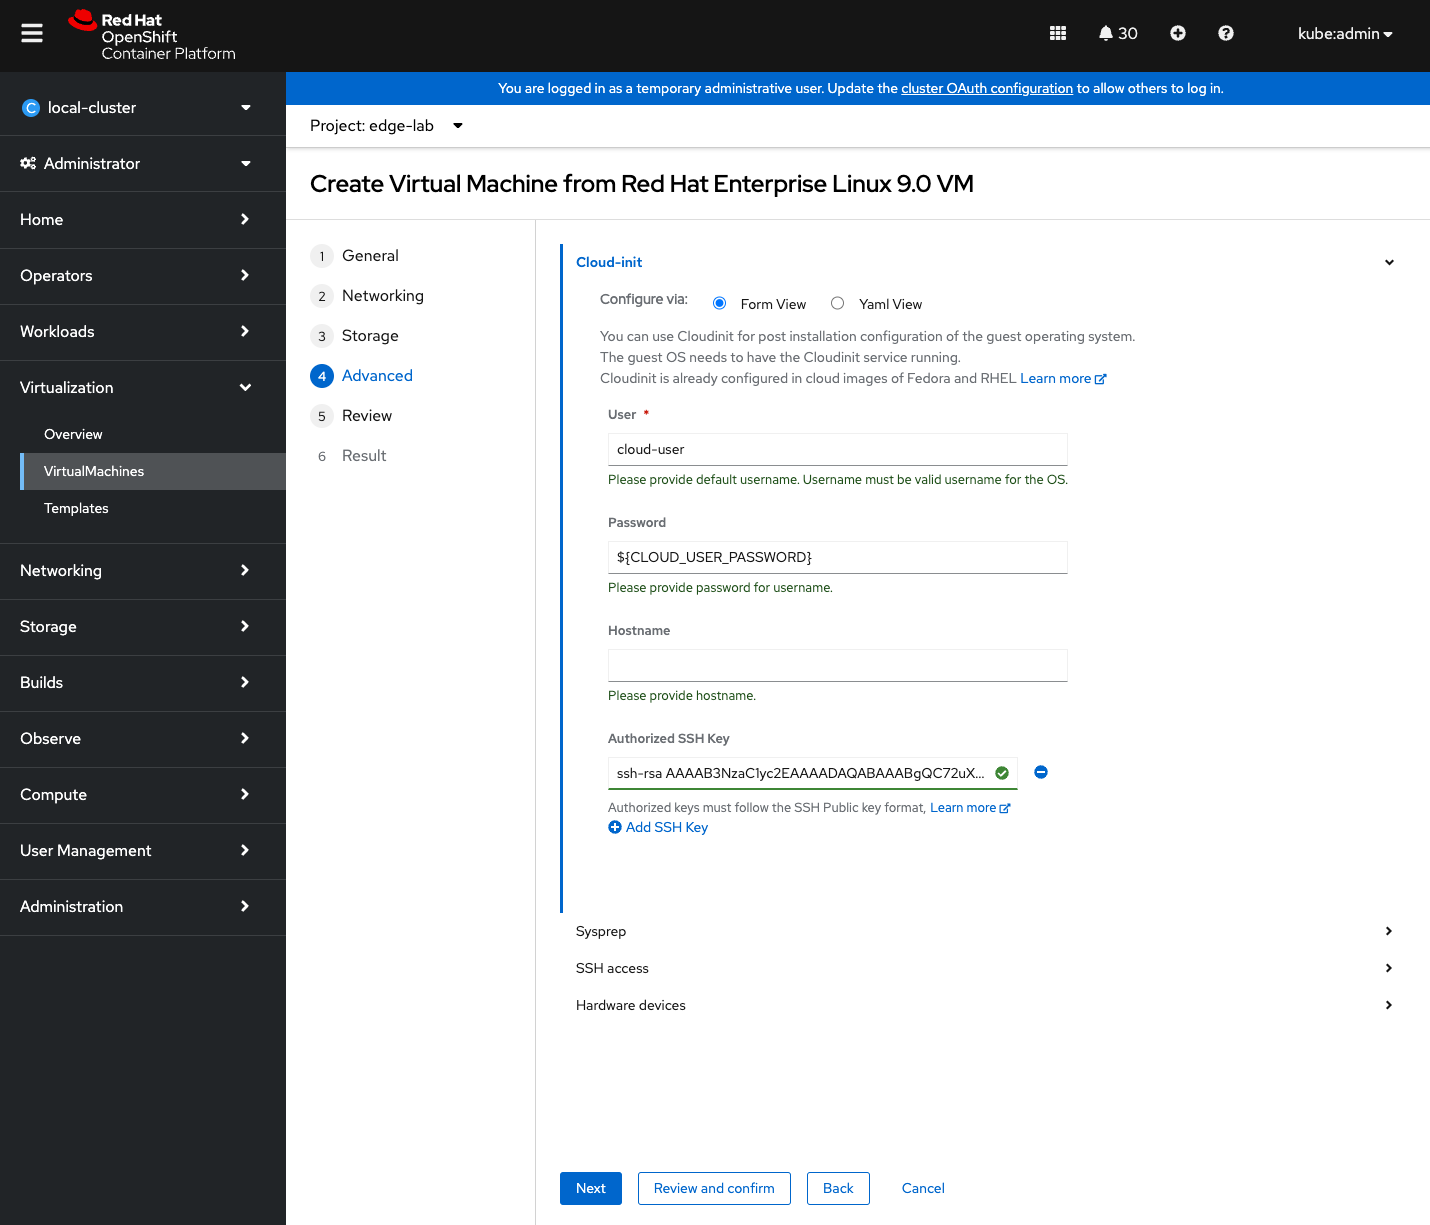
In “Advanced” tab you probably don’t have to change anything, just confirm you have configured the right SSH key and if you REALLY need it, you can specify your own password for the default cloud-user.
Now just a quick check on the review page and you can continue the VM creation. After a while your VM should be up and running.
Accessing edge-helper virtual machine
The edge-helper VM is up and running now, but before we start configuring it we need to somehow access it first 😉
Since you checked the option to expose SSH access before, you have to find now what is the IP address and the port number where the SSH of edge-helper VM can be accessed.
The port
The port number can be found with CLI or VM’s detail page
[rafal@host ~]$ oc get svc
NAME                      TYPE       CLUSTER-IP       EXTERNAL-IP   PORT(S)           AGE
edge-helper-ssh-service   NodePort   172.30.169.111   <none>        22000:31094/TCP   123m

[rafal@host ~]$ oc get svc edge-helper-ssh-service -o jsonpath='{.spec.ports[].nodePort}'
31094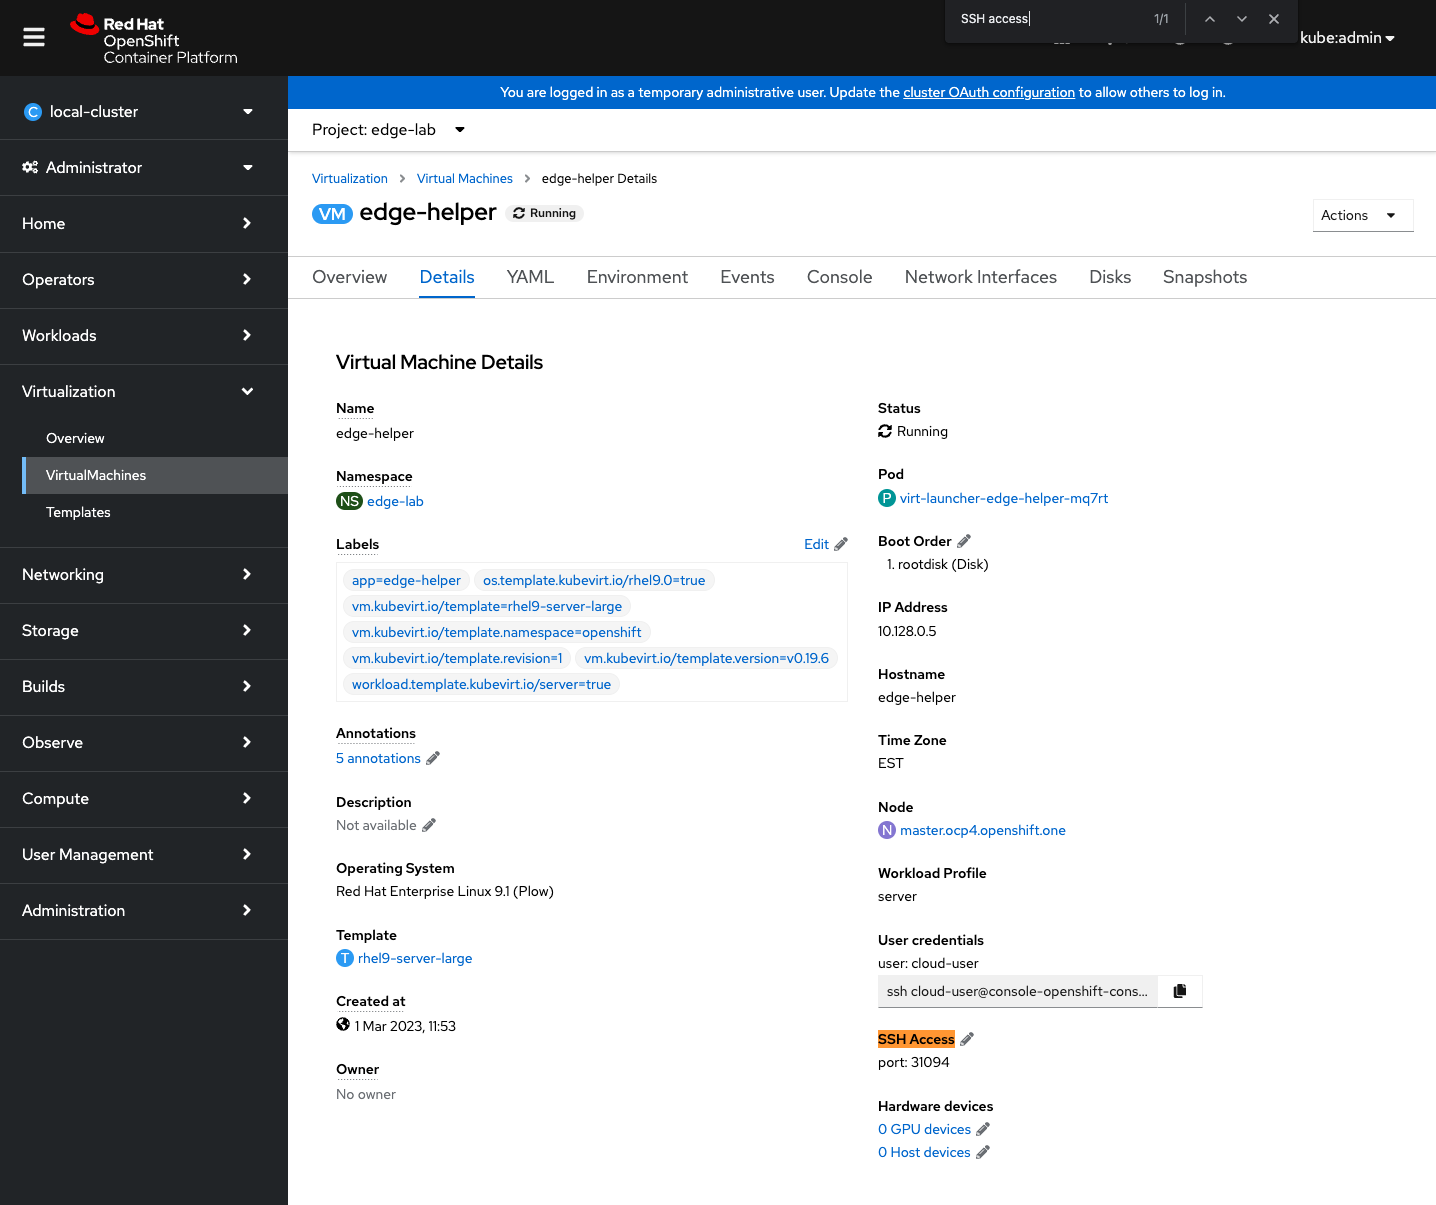
The IP address
SSH is exposed through NodeIP address, hence you need to get one of the nodes IPs. You can do it again either via CLI or WebUI
[rafal@host ~]$ oc get nodes -o jsonpath='{.items[].status.addresses [?(@.type=="InternalIP")].address}'
192.168.232.127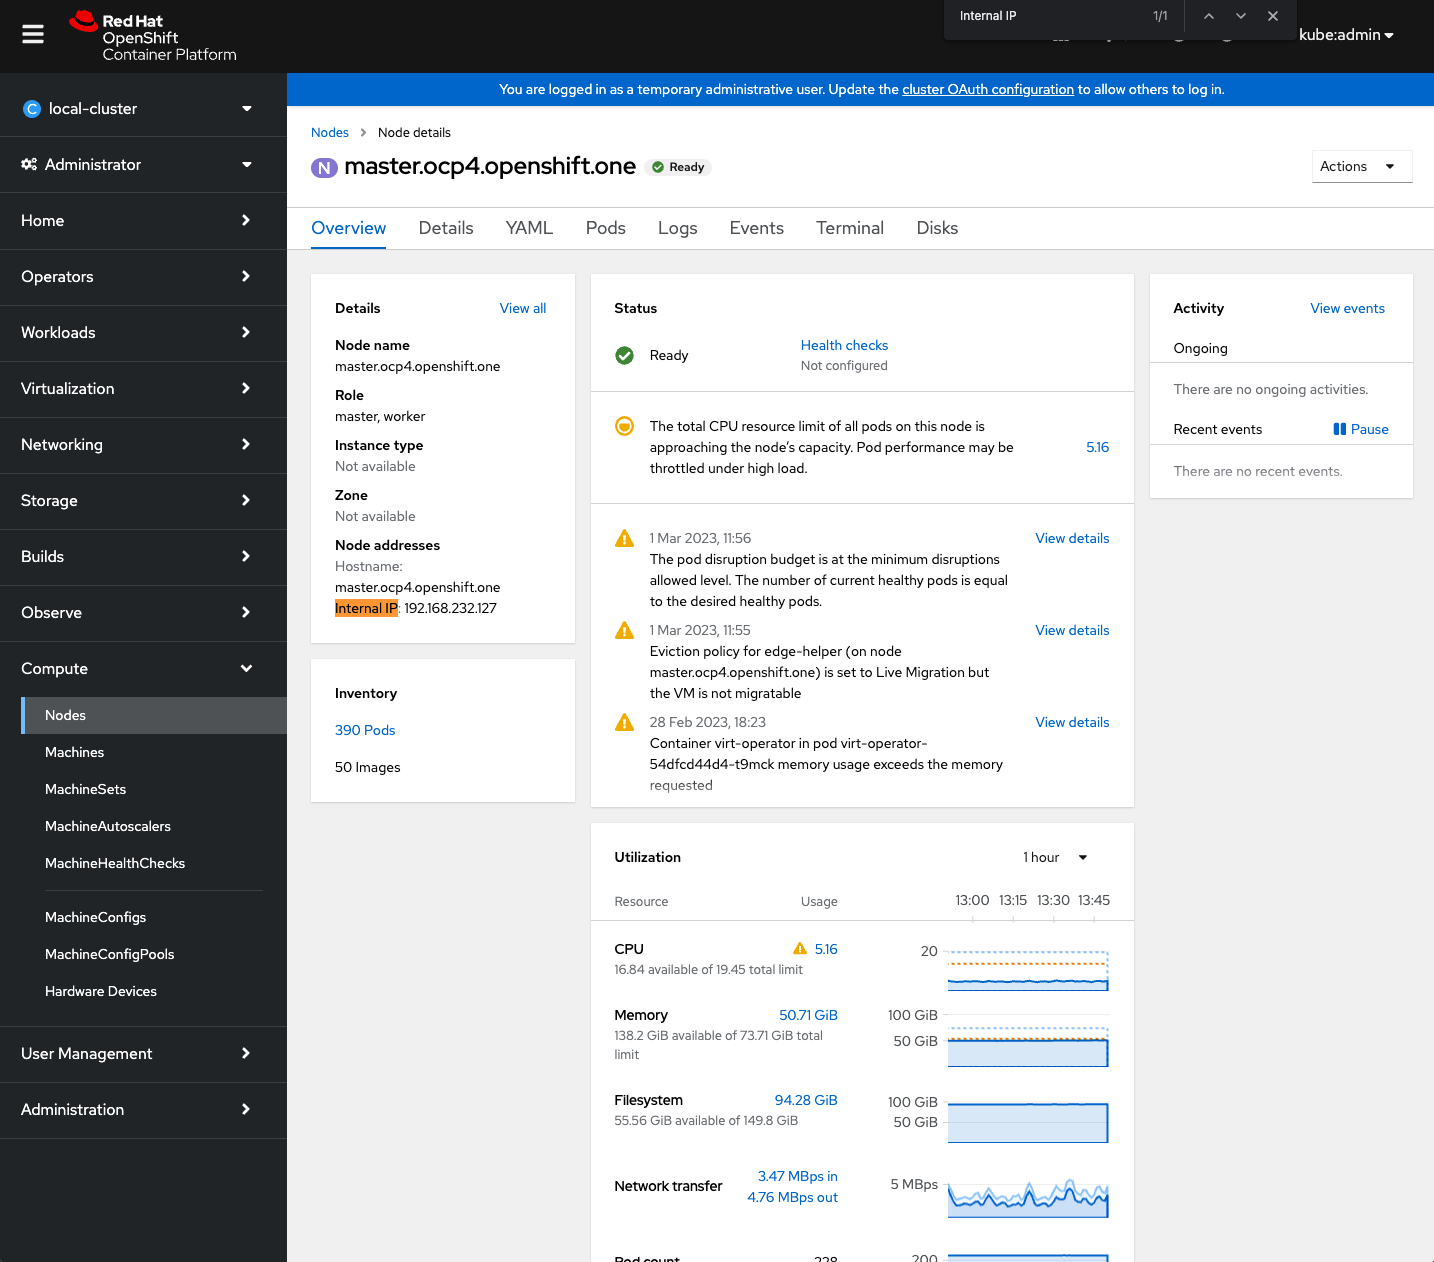
The password
You should not need a password to access the VM since we got SSH key configured, however you will need the password later to access VM’s WebUI console. You can obtain it with the following command:
[rafal@host ~]$ oc get vm edge-helper -o jsonpath='{.spec.template.spec.volumes[?(@.name=="cloudinitdisk")].cloudInitNoCloud.userData}'  | grep ^password
password: '__SuperSecretPassword.8__'
Connecting to the VM
Once you got both the IP address and the port number, you can SSH to it using previously configured SSH key. Let’s do it and verify you’ve got all the NICs available there.
[rafal@host ~]$ ssh cloud-user@192.168.232.127 -p 31094
[cloud-user@edge-helper ~]$ ip -o l
1: lo: <LOOPBACK,UP,LOWER_UP> mtu 65536 qdisc noqueue state UNKNOWN mode DEFAULT group default qlen 1000    link/loopback 00:00:00:00:00:00 brd 00:00:00:00:00:00
2: eth0: <BROADCAST,MULTICAST,UP,LOWER_UP> mtu 1400 qdisc mq state UP mode DEFAULT group default qlen 1000    link/ether 02:bb:1e:00:00:0e brd ff:ff:ff:ff:ff:ff    altname enp1s0
3: eth1: <BROADCAST,MULTICAST,UP,LOWER_UP> mtu 1500 qdisc mq state UP mode DEFAULT group default qlen 1000    link/ether 02:bb:1e:00:00:0f brd ff:ff:ff:ff:ff:ff    altname enp2s0
Configuring edge-helper Virtual Machine
Registering VM with Red Hat
Once you’re logged in please register the VM with Red Hat in order to obtain access to packages and attach it to the right pool providing required RHEL packages
[root@edge-helper ~]# subscription-manager register
Registering to: subscription.rhsm.redhat.com:443/subscription
Username: <your RHN username>
Password: <your RHN password>
The system has been registered with ID: __some-random-string-is-here__
The registered system name is: edge-helper
[root@edge-helper ~]# subscription-manager attach --auto
Installing base packages
The process of installation and configuration all the required services for edge-helper VM is automated through Ansible, so for now you need only the following three packages to be installed:
- ansible-core
- python3-netaddr
- git
Furthermore you need to install community.general and ansible.utils Ansible’s collections.
Please note: This guide assumes you’re configuring the edge-helper VM locally, hence these packages are being installed directly on it. Alternatively you can do it remotely from some other host with the above packages and collections installed.
[root@edge-helper ~]# dnf install -y ansible-core git python3-netaddr
[root@edge-helper ~]# ansible-galaxy collection install community.general ansible.utils
Cloning openshift-lab repository
This is where all the good stuff that automates most of the things is hosted. Please clone it locally. The content for this lab is in rhel4edge-00 directory.
[root@edge-helper ~]# git clone https://github.com/rszmigiel/openshift-lab.gitConfiguring localhost ssh-key access
To make it easier, create and add ssh key for localhost authentication. This is just to automate localhost access on the edge-helper VM:
[root@edge-helper ~]# ssh-keygen
Generating public/private rsa key pair.
(...)
[root@edge-helper ~]# cat .ssh/id_rsa.pub >> .ssh/authorized_keys
Installing and configuring Image Builder service
Playbook variables
There is just one required variable you have to set, cluster-name which allows the playbook to download and install virtctl CLI tool on the edge-helper VM. It should include the domain name as well, for an instance: cluster-name.example.com
The list of all available variables is as follows:
| variable | required | default | description |
|---|---|---|---|
| cluster_name | yes | none | cluster-name.example.com |
| ip_range | no | 192.168.10.0/24 | IP range for edge network |
| ip_address | no | 2nd IP from ip_range | IP address for VM’s edge network interface |
| ip_gw | no | VM’s IP address | Edge network gateway, by default it is edge-helper vm itself |
| dhcp_interface | no | eth1 | Name of the NIC connected to edge network |
Run the playbook
The playbook will perform the following actions:
- one
- two
- three
- tbd
[root@edge-helper rhel4edge-00]# ansible-playbook -i localhost, install_image_builder.yml -e "ocp_cluster-name=cluster-name.example.com"or alternatively if you want to override some of the default variables:
[root@edge-helper rhel4edge-00]# ansible-playbook -i localhost, install_image_builder.yml -e "ocp_cluster-name=cluster-name.example.com" -e "ip_range=192.168.20.0/24" -e "ip_gw=192.168.20.254"Logging to the OpenShift cluster from edge-helper VM
Firstly let’s login to the OCP cluster through oc CLI and straight away switch to edge-lab project. This will let you run all oc and virtctl commands from the edge-helper VM.
[root@edge-helper ~]# oc login -u kubeadmin api.cluster-name.example.com:6443
Authentication required for https://api.cluster-name.example.com:6443 (openshift)
Username: kubeadmin
Password: ********
Login successful.

You have access to 92 projects, the list has been suppressed. You can list all projects with 'oc projects'

Using project "default".
[root@edge-helper ~]# oc project edge-lab
Now using project "edge-lab" on server "https://api.cluster-name.example.com:6443".
Adding OpenShift’s service CA to locally trusted certificates
Most likely your OCP cluster runs self-signed certificates which aren’t recognised by edge-helper VM. Let’s install them locally so we won’t be bothered by unknown CA warnings later.
[root@edge-helper ~]# oc extract cm/openshift-service-ca.crt --to=/etc/pki/ca-trust/source/anchors/
/etc/pki/ca-trust/source/anchors/service-ca.crt
[root@edge-helper ~]# update-ca-trust --extract
Get cloud-user password
If you didn’t explicitly configure password during VM creation or you didn’t obtain it previously, here is a snippet to get it from cloudInit userData stored in the VM definition. You will need the password to access WebUI console.
[root@edge-helper ~]# oc get vm edge-helper -o jsonpath='{.spec.template.spec.volumes[?(@.name=="cloudinitdisk")].cloudInitNoCloud.userData}' | grep ^password
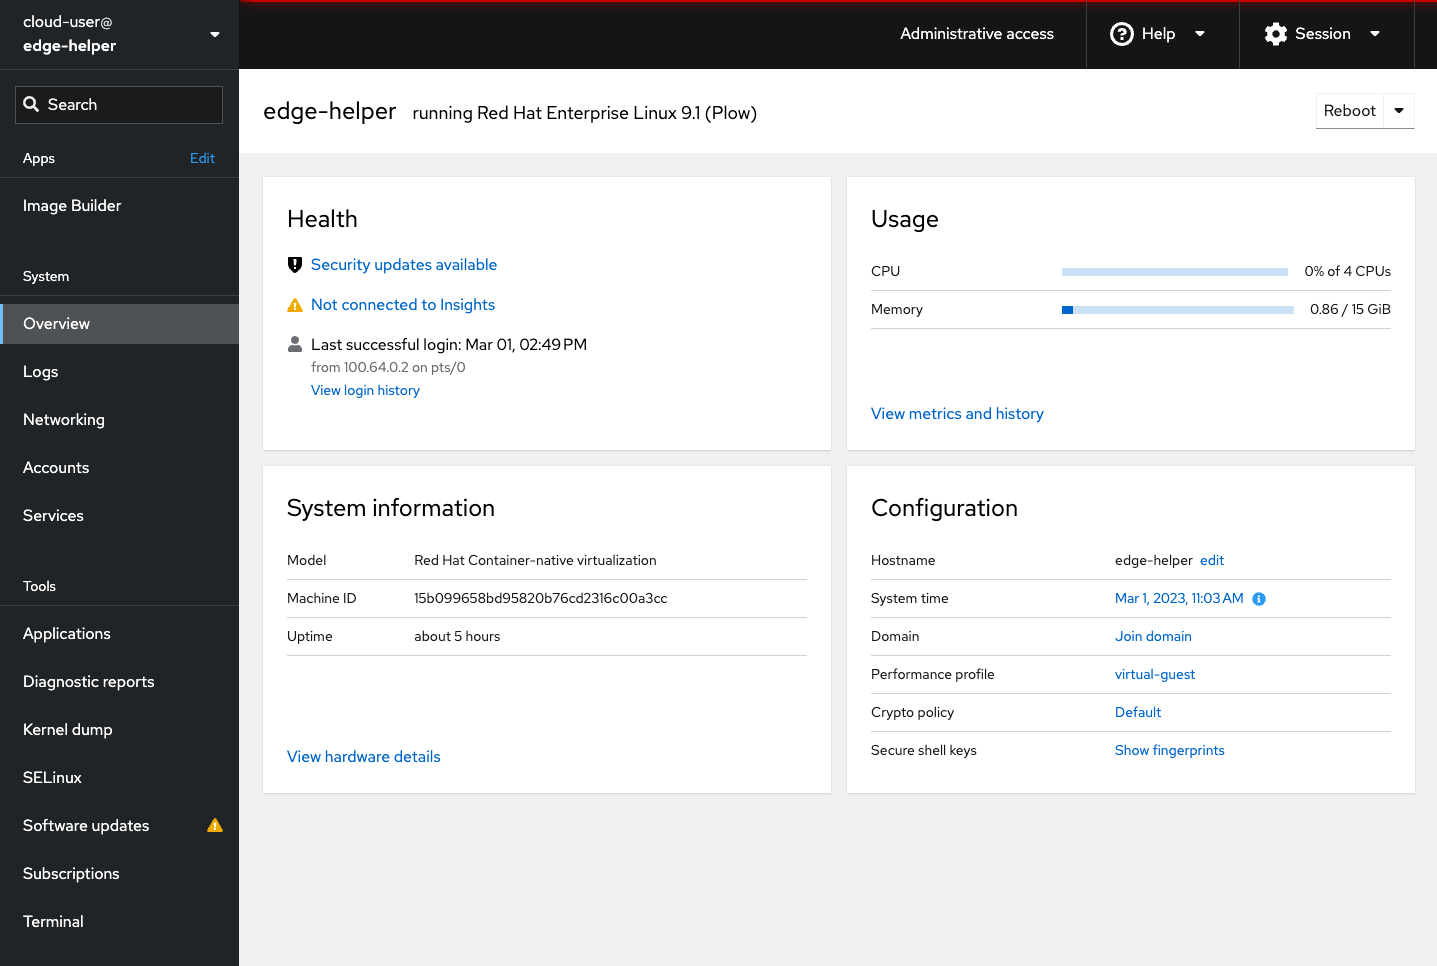
password: '__SuperSecretPassword.8__'Expose and access edge-helper WebUI console
By default you got SSH service created and exposed of edge-helper VM during its installation. You can also expose its WebUI console which listens on 9090/tcp port in order to access it externally.
Using virtctl let’s create service first and with oc CLI create route pointing to it.
[root@edge-helper ~]# virtctl expose vmi edge-helper --port=9090 --name=image-builder
Service image-builder successfully exposed for vmi edge-helper
[root@edge-helper ~]# oc create route passthrough --service=image-builder
route.route.openshift.io/image-builder created
[root@edge-helper ~]# oc get routes
NAME            HOST/PORT                                        PATH   SERVICES        PORT    TERMINATION   WILDCARD
image-builder   image-builder-edge-lab.apps.cluster-name.example.com          image-builder   <all>   passthrough   None
With the output above you can say the WebUI console is available at https://image-builder-edge-lab.apps.cluster-name.example.com. In your case it will be obviously different but now you should be able to login there using cloud-user user and the password you retrieved step before.
The very first image
It takes a while to build an image, especially in resource limited environment, so let’s do it before we proceed with the second part of edge-helper VM configuration.
To quickly explain what this image really is I will quote official Red Hat’s documentation:
A RHEL for Edge image is an rpm-ostree image that includes system packages to remotely install RHEL on Edge servers.
The system packages include:
- Base OS package
- Podman as the container engine
- Additional RPM content
Differently from RHEL images, RHEL for Edge is an immutable operating system, that is, it contains a read-only root directory with the following characteristics:
- The packages are isolated from root directory
- Package installs create layers that make it easy to rollback to previous versions
- Efficient updates to disconnected environments
- Supports multiple operating system branches and repositories
- Has a hybrid rpm-ostree package system
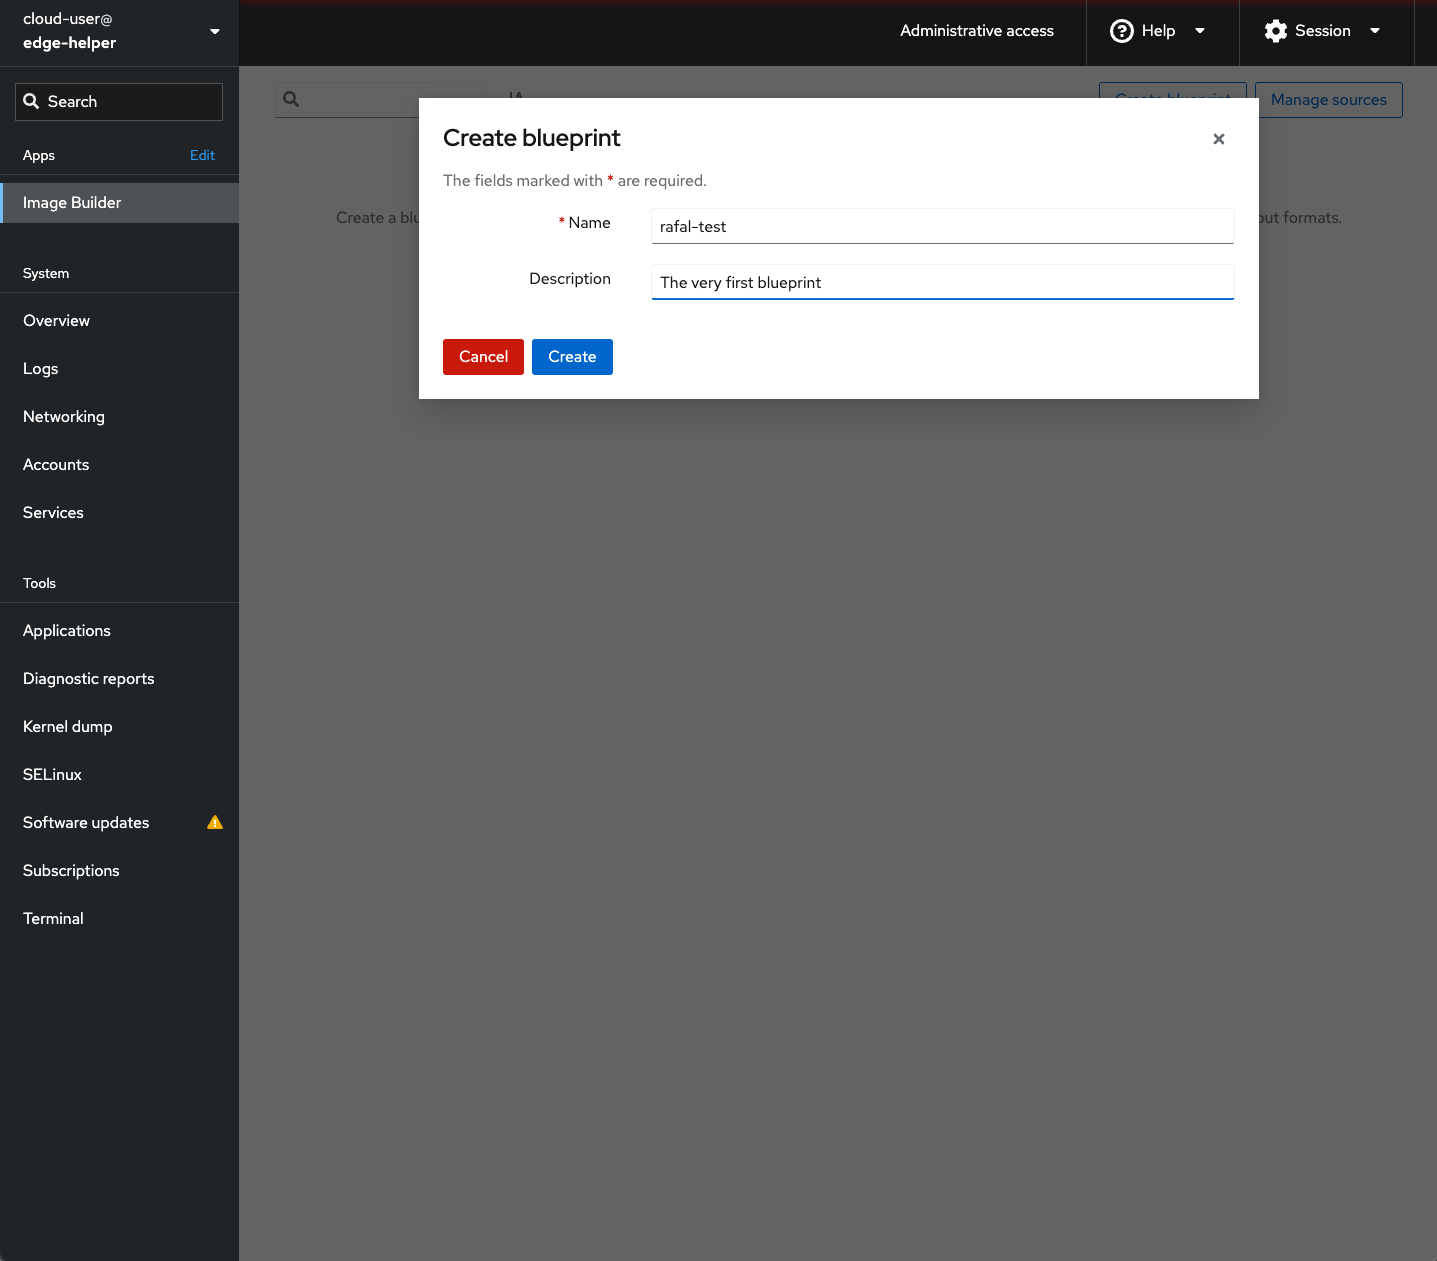
Images are being created from blueprints. Blueprint is a kind of receipt of what should be included in the image on the top of the defaults provided out of the box by Red Hat. Oh – you can also use blueprint to remove unwanted bits as well 🙂
You’re now at edge-helper console page, so from the left menu chose Image Builder option and create a new blueprint.
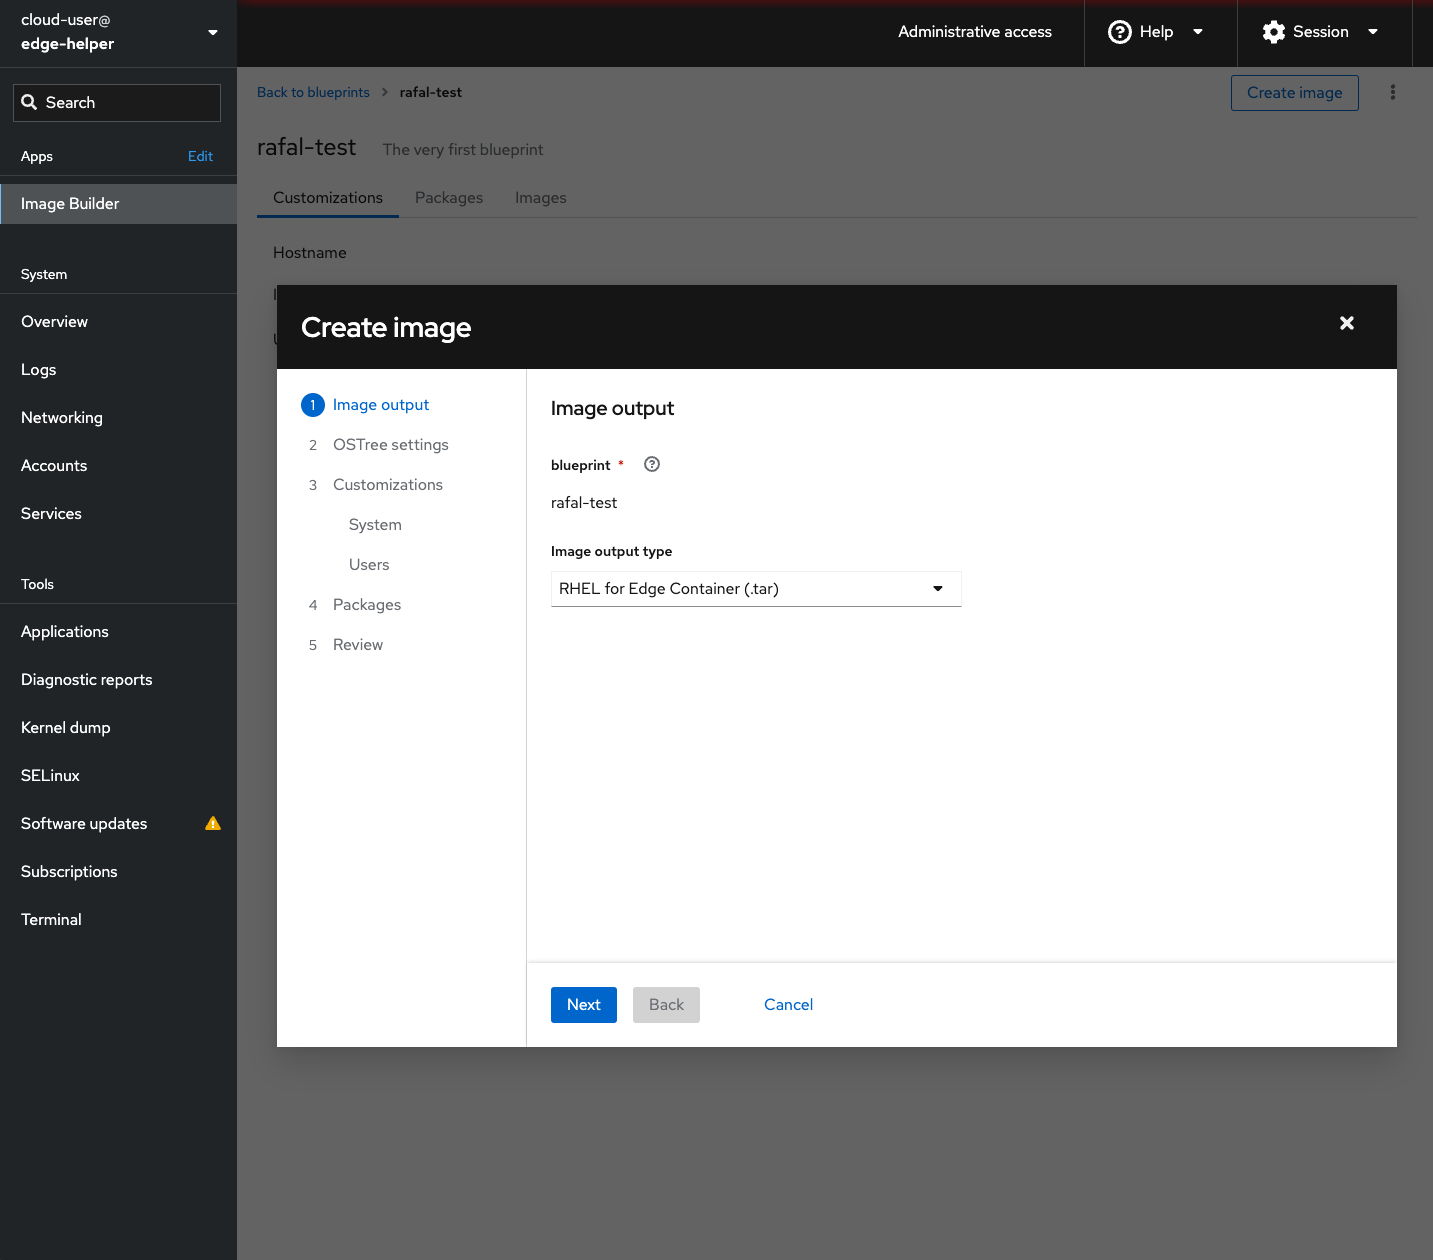
Once you got blueprint ready, please create image from it. You apply some customisations during this step.
Select Create image and ensure Image output type is set to RHEL for Edge Container (.tar). There are other image output types which are described in detail here: 1.2. How to compose and deploy a RHEL for Edge image, but since you’re running OpenShift already let’s use it to host the container with image natively.
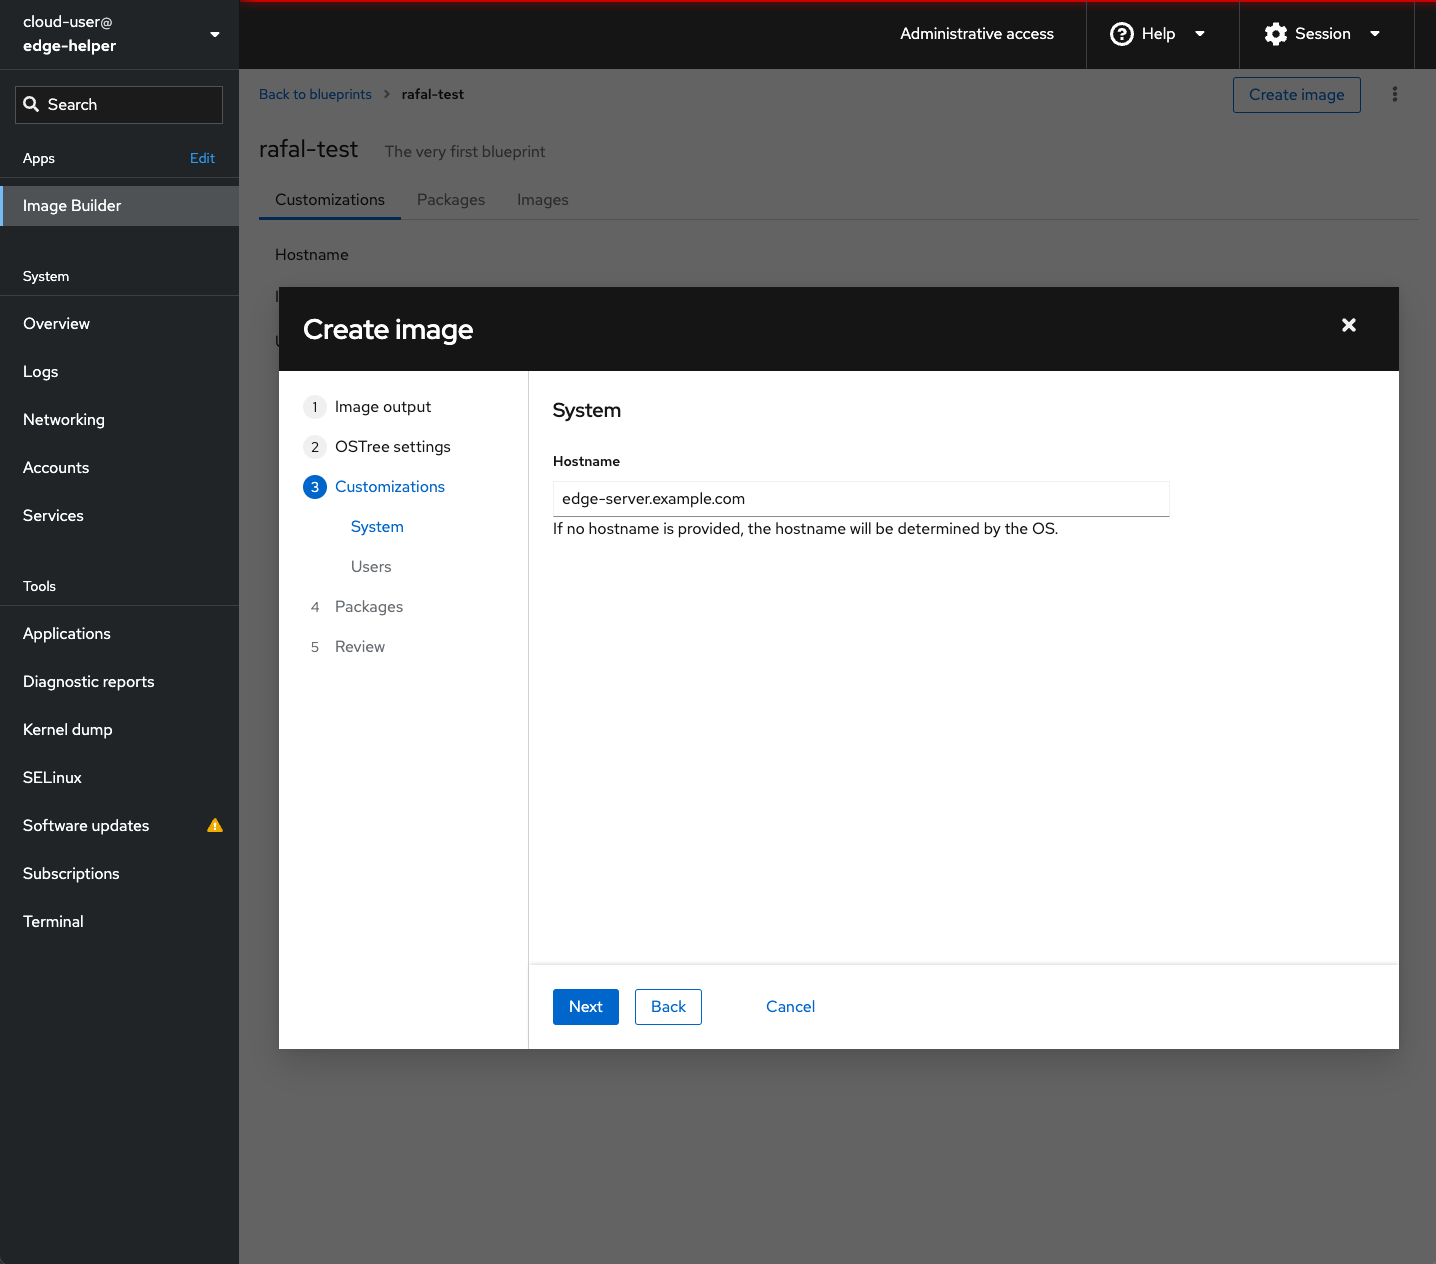
In the OSTree settings section you don’t have to fill anything at this time, so please skip it and move to the next section.
In Customizations / System please assign hostname to our edge server. If not defined here it could be provided via DHCP what probably makes better sense at the large scale deployments.
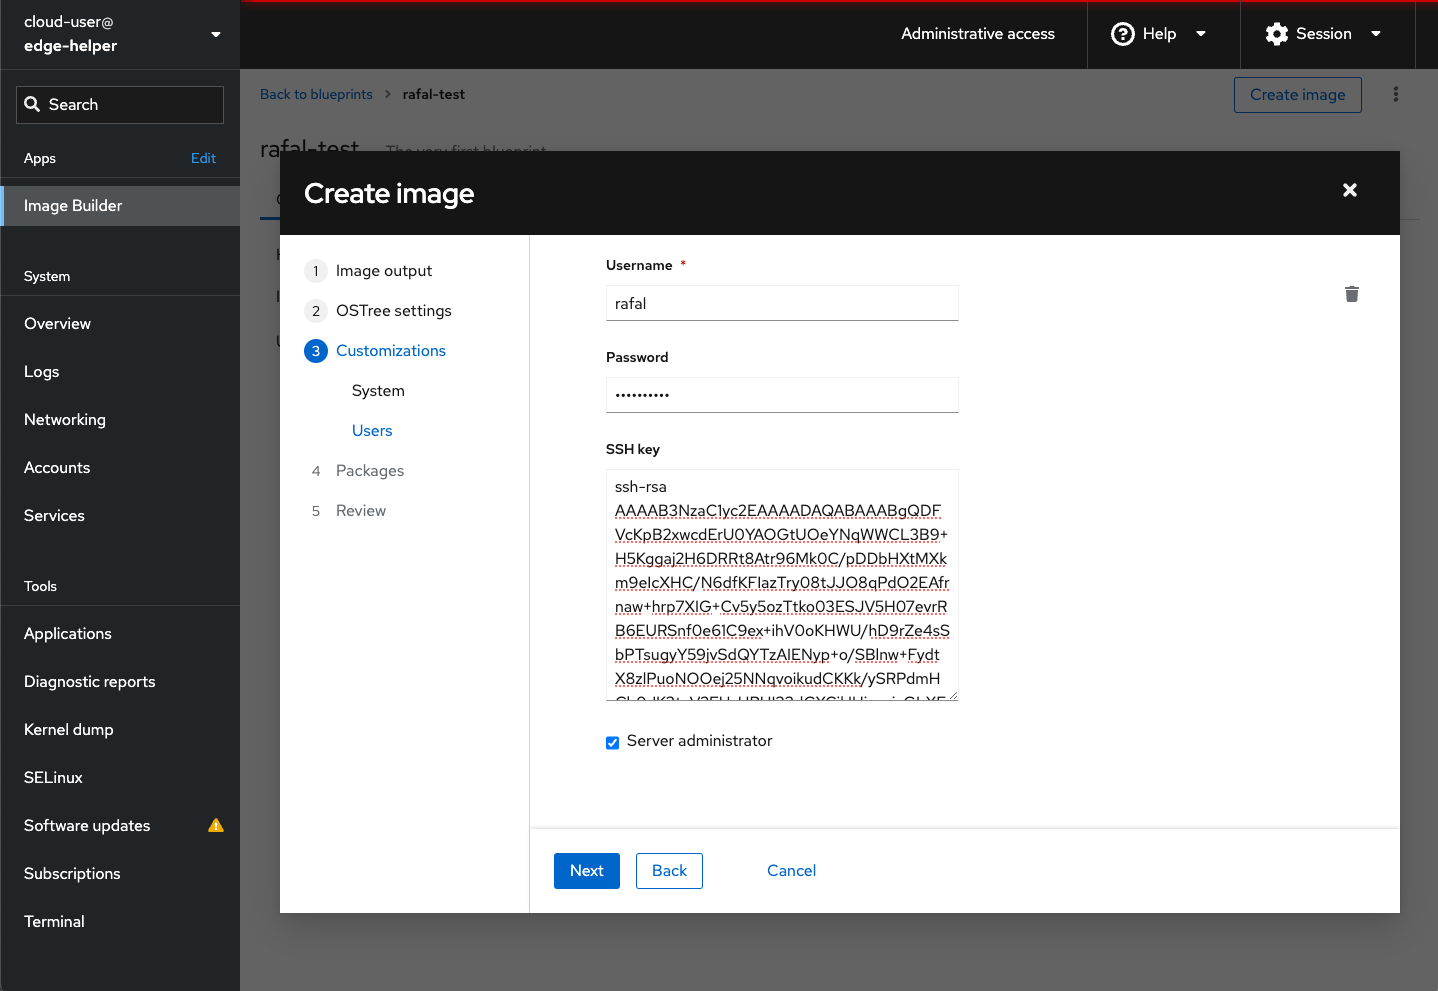
In Customizations / Users you can add extra user to the system. Please note users can be added in the image only at the bootstrap time, later users have to be added locally (ie. adding new user to upgrade image won’t create user on existing system being upgraded). Also please note there is checkbox bellow to assign the user with Server administrator privileges (sudo permissions).
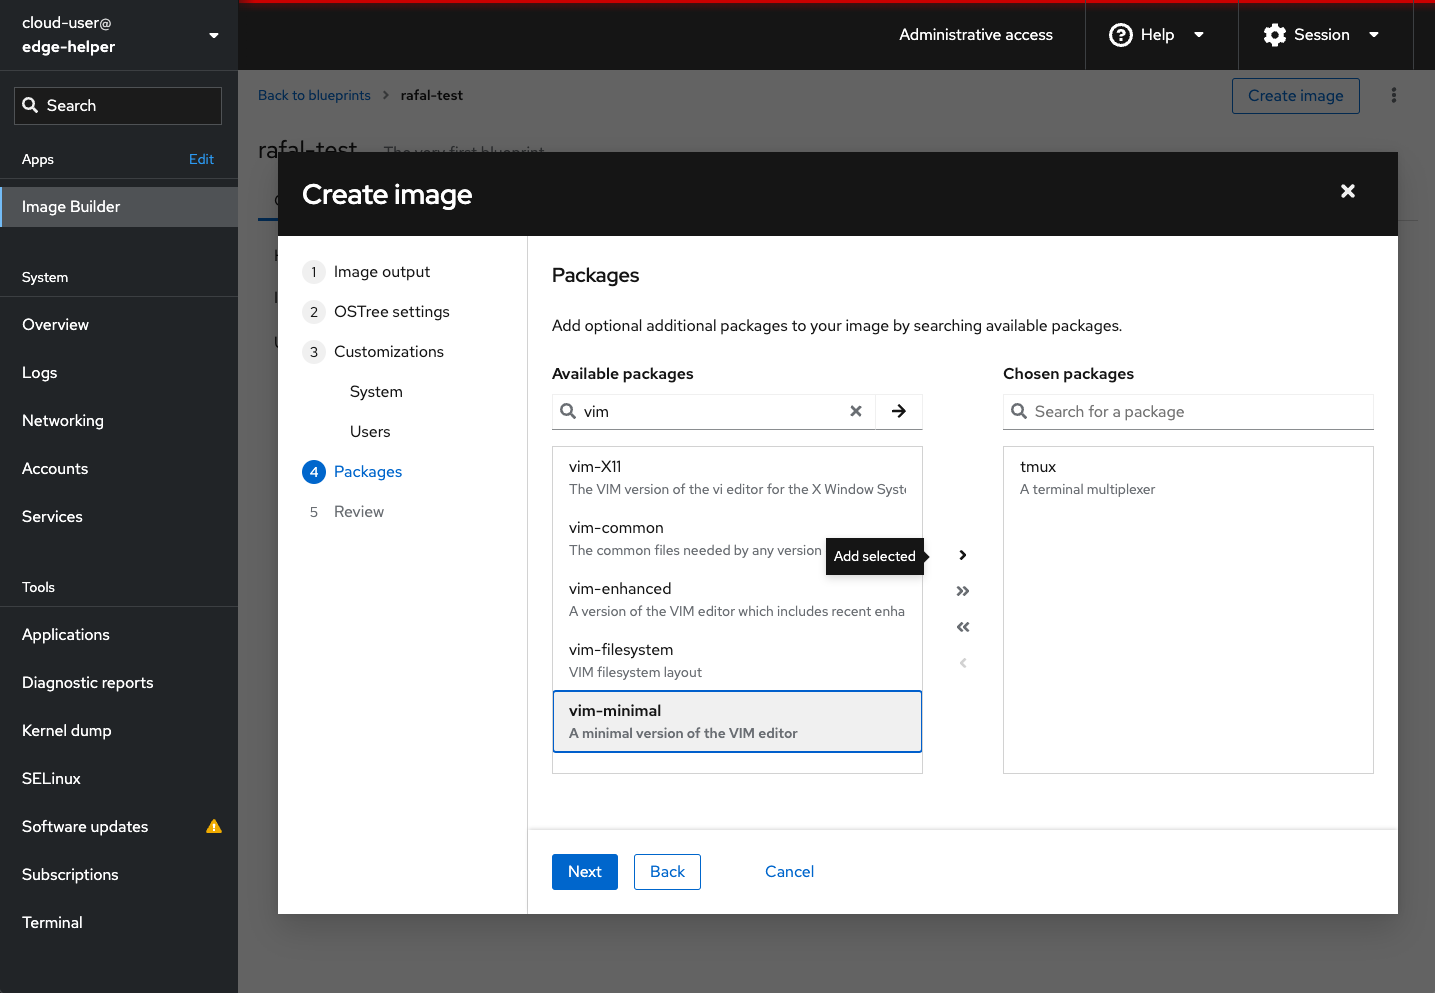
In Packages we can add extra packages to the image
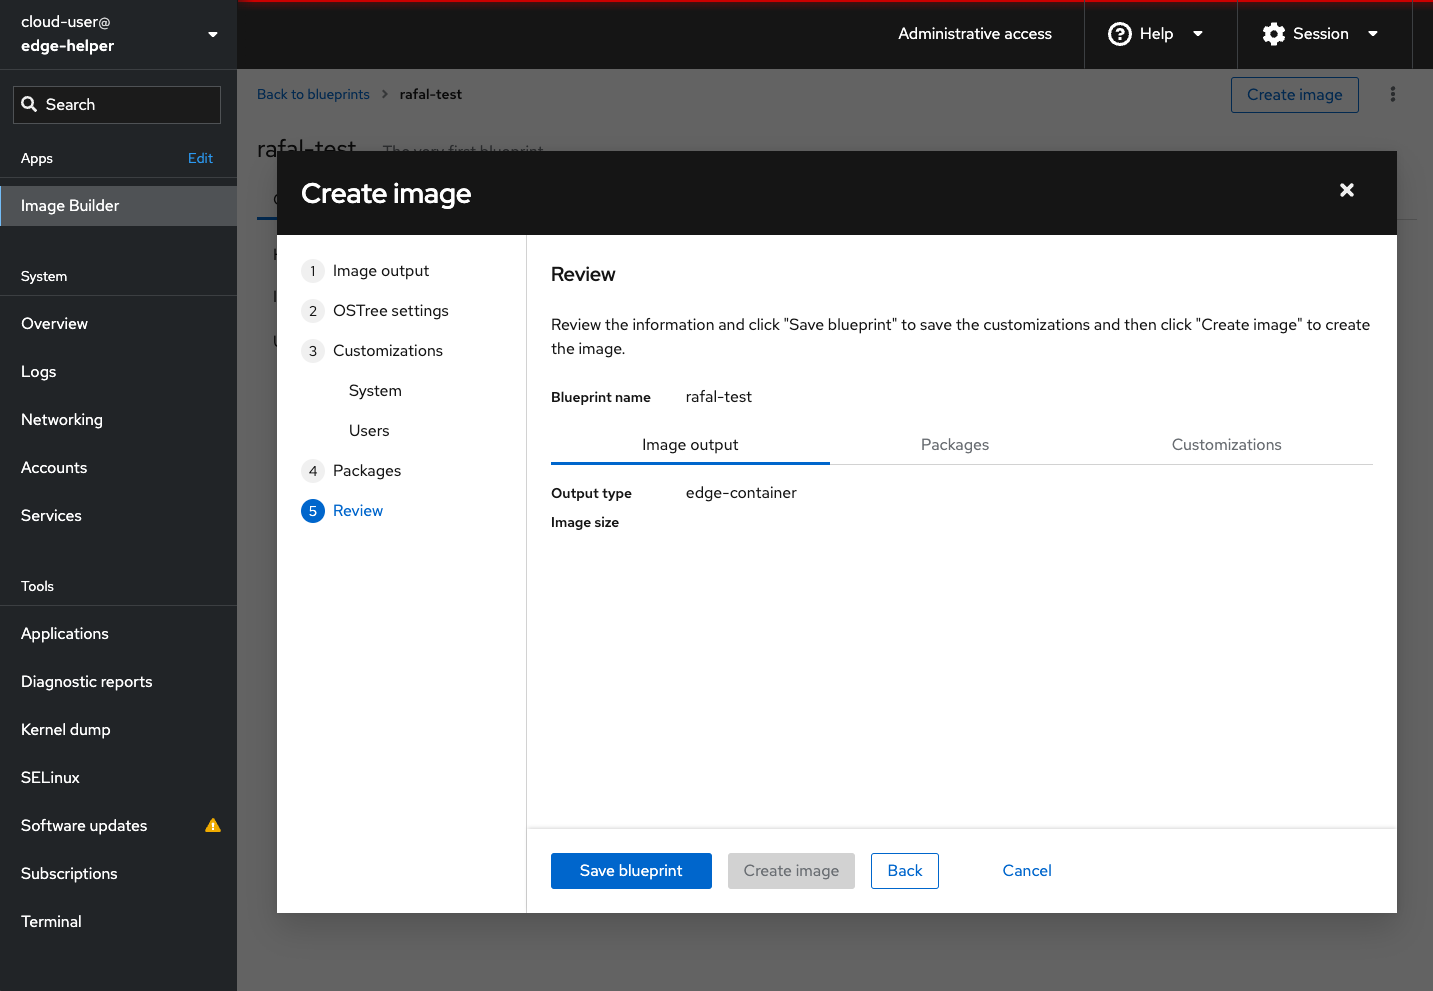
Before we create blueprint and image from it, let’s review the configuration we made. Ensure the output type is edge-container. Save the blueprint and Create the image.
You can watch the image build status either via CLI or WebUI
[root@edge-helper ~]# composer-cli compose list
5ebc967a-c248-46ca-b817-dd22b395bc2c RUNNING rafal-test 0.0.1 edge-container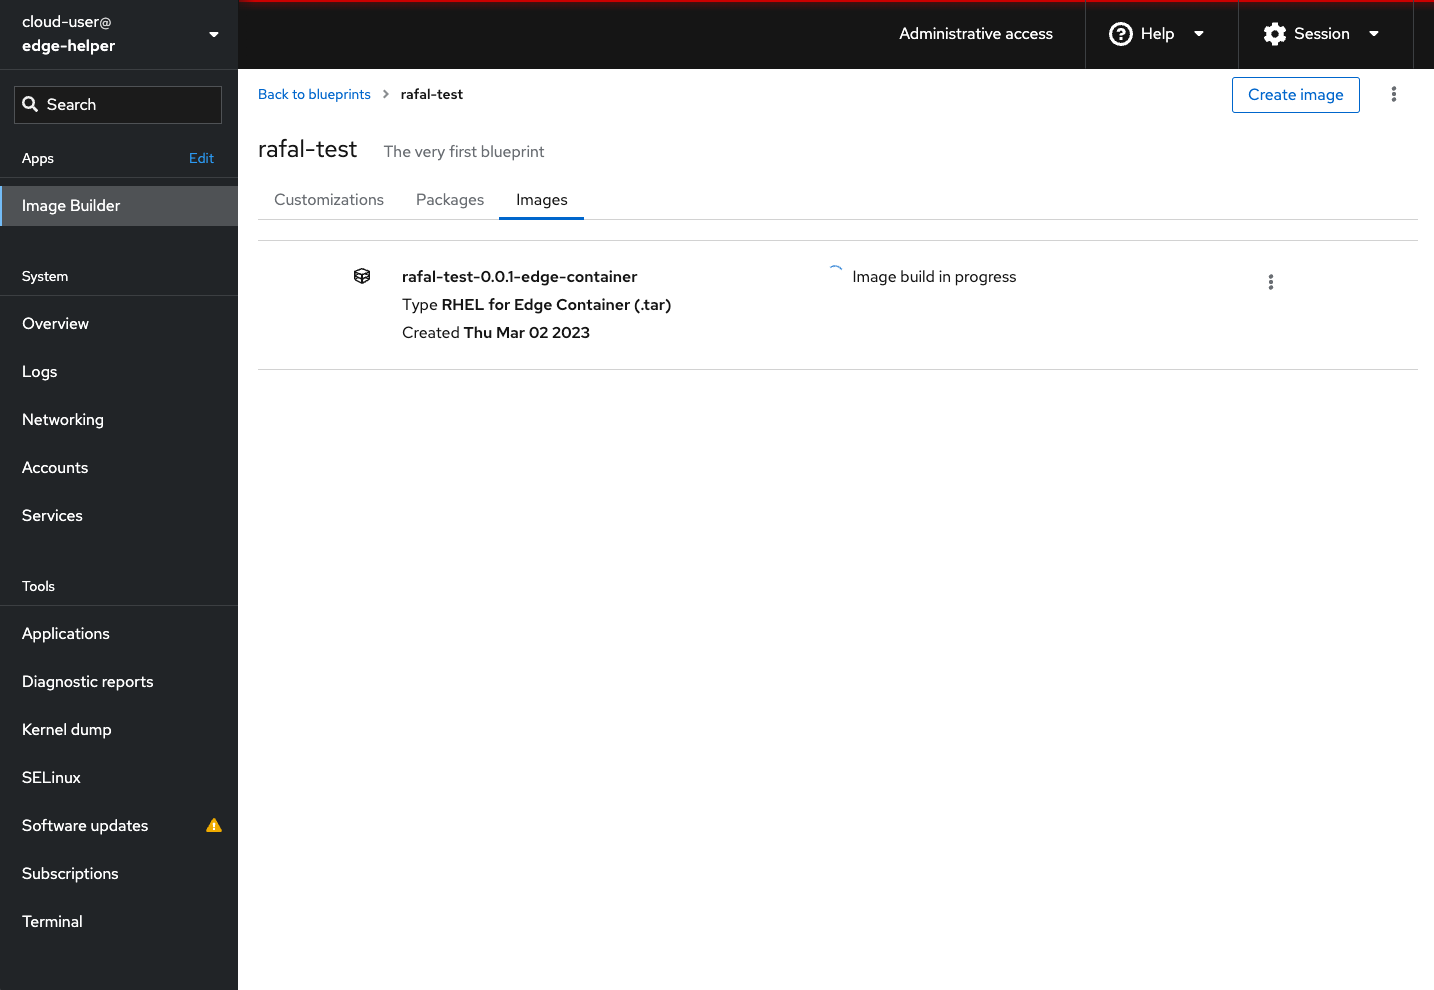
Installing and configuring dnsmasq and nginx services on edge-helper VM.
Since it may take some time to get the image build process done, let’s configure dnsmasq and nginx on the edge-helper VM while image is being created. You have another playbook to be run and two mandatory variables to be specified with it. This playbook apart from dnsmasq and nginx installation and configuration will also do:
- one
- two
- three
| variable | required | default | description |
|---|---|---|---|
| rhel_boot_url | yes | none | The URL where Red Hat Enterprise Linux Boot ISO image can be downloaded from. Get it from https://access.redhat.com/downloads/content/479/ver=/rhel—9/9.1/x86_64/product-software |
| image_location | yes | none | This is URL where edge-container image will be exposed as an OpenShift’s route |
| ip_gw | no | VM’s IP address | Edge network gateway, by default it is the VM |
| dhcp_interface | no | eth1 | Name of the NIC connected to edge network |
The image_location variable is the location where image container content will be available for the bootstrap process. Typically in OpenShift the format is: service-name–project-name.apps.cluster-name.cluster-domain but it can be customised. For the purpose of this document I use the defaults. Let’s run the playbook and once it finish, you should have the image built process being completed.
[root@edge-helper rhel4edge-00]# ansible-playbook -i localhost, install_dnsmasq.yml -e "rhel_boot_url=https://access.cdn.redhat.com/content/origin/files/sha256/(...)/rhel-baseos-9.1-x86_64-boot.iso?user=(...)&_auth_=(...)" -e "image_location=http://edge-container-edge-lab.apps.cluster-name.example.com/repo"Getting the image container running on OpenShift
Hopefully the build of the image has been complete now. Verify it with the following commands. You’re looking for your image with FINISHED state 😉 so you can download it to edge-helper VM using composer-cli compose image command and image’s UUID as the parameter.
[root@edge-helper ~]# composer-cli compose list
5ebc967a-c248-46ca-b817-dd22b395bc2c FINISHED rafal-test 0.0.1 edge-container

[root@edge-helper ~]# composer-cli compose image 5ebc967a-c248-46ca-b817-dd22b395bc2c
5ebc967a-c248-46ca-b817-dd22b395bc2c-container.tar
Once you get the tar file downloaded, load it to the local podman’s image registry and tag accordingly so you can put it to OpenShift’s image registry service as bellow.
Please note: since the edge-helper VM is running on the top of OpenShift Virtualization, you can access other OpenShift services directly without the need of creating and using external route/ingress.
[root@edge-helper ~]# podman load -i 5ebc967a-c248-46ca-b817-dd22b395bc2c-container.tar
Getting image source signatures
Copying blob eee3c89aa887 done
Copying config 66cc26987d done
Writing manifest to image destination
Storing signatures
Loaded image: sha256:66cc26987d9c3e21d43b90b8949cfdd144391be496f3958aeb3f7d0070a85a7d

[root@edge-helper ~]# podman images
REPOSITORY                       TAG         IMAGE ID      CREATED      SIZE
<none>                           <none>      66cc26987d9c  2 hours ago  922 MB

[root@edge-helper ~]# podman tag 66cc26987d9c image-registry.openshift-image-registry.svc.cluster.local:5000/edge-lab/rafal-test:0.0.1

[root@edge-helper ~]# podman login -u kubeadmin -p $(oc whoami -t) image-registry.openshift-image-registry.svc.cluster.local:5000/edge-lab
Login Succeeded!

[root@edge-helper ~]# podman push image-registry.openshift-image-registry.svc.cluster.local:5000/edge-lab/rafal-test:0.0.1
Getting image source signatures
Copying blob fa84083736a8 done
Copying config 66cc26987d done
Writing manifest to image destination
Storing signatures
Get that thing running now! 🙂
Please note: RHEL for Edge container is running nginx bound to 8080/tcp port.
[root@edge-helper ~]# oc run edge-container --image=image-registry.openshift-image-registry.svc.cluster.local:5000/edge-lab/rafal-test:0.0.1 --port=8080
pod/edge-container created

[root@edge-helper ~]# oc get pods
NAME                              READY   STATUS    RESTARTS   AGE
edge-container                    1/1     Running   0          5s
virt-launcher-edge-helper-mq7rt   1/1     Running   0          24h
You got the pod running so now expose 8080/tcp port where the nginx serving the image content is listening and create route for it, so edge-server VM can reach it as it doesn’t have direct access to the podNetwork so it cannot access services directly, without route or ingress.
[root@edge-helper ~]# oc expose pod edge-container
service/edge-container exposed

[root@edge-helper ~]# oc get svc edge-container
NAME             TYPE        CLUSTER-IP      EXTERNAL-IP   PORT(S)    AGE
edge-container   ClusterIP   172.30.82.192   <none>        8080/TCP   11s

[root@edge-helper ~]# oc expose svc edge-container
route.route.openshift.io/edge-container exposed

[root@edge-helper ~]# oc get route edge-container
NAME             HOST/PORT                                         PATH   SERVICES         PORT   TERMINATION   WILDCARD
edge-container   edge-container-edge-lab.apps.cluster-name.example.com          edge-container   8080                 None
Let’s double check if we can really reach it as expected
[root@edge-helper ~]# curl http://edge-container-edge-lab.apps.cluster-name.example.com/repo/refs/heads/rhel/9/x86_64/edge

8fad2a65c1873987dae3c5ed28be350180a3b4386b0650a4e24f06925c71c595
Running an edge server
Or technically speaking, a VM which is going to simulate an edge server. There are few things to notice:
- bootOrder parameter – which let you configure in what order server should try to boot from specific device. In the config bellow the server try to boot from disk first, then from network. Since disk is empty it will effectively boot over network through iPXE.
- secureBoot parameter – it disables UEFI secure boot which is enabled by default since our image isn’t signed
- networkName parameter – to specify the VM has to be attached to br-edge network
[root@edge-helper ~]# cat << EOF | oc create -f -
apiVersion: kubevirt.io/v1
kind: VirtualMachine
metadata:
labels:
app: rhel-edge-server
name: rhel-edge-server
spec:
dataVolumeTemplates:
- apiVersion: cdi.kubevirt.io/v1beta1
kind: DataVolume
metadata:
name: rhel-edge-server
spec:
source:
blank: {}
storage:
resources:
requests:
storage: 30Gi
running: false
template:
metadata:
annotations:
vm.kubevirt.io/flavor: small
vm.kubevirt.io/os: rhel9
vm.kubevirt.io/workload: server
labels:
kubevirt.io/domain: rhel-edge-server
kubevirt.io/size: small
spec:
domain:
cpu:
cores: 1
sockets: 1
threads: 1
devices:
disks:
- disk:
bus: virtio
name: rhel-edge-server
bootOrder: 1
interfaces:
- bridge: {}
bootOrder: 2
model: virtio
name: nic-0
networkInterfaceMultiqueue: true
rng: {}
features:
smm:
enabled: true
firmware:
bootloader:
efi:
secureBoot: false
machine:
type: pc-q35-rhel8.4.0
resources:
requests:
memory: 2Gi
evictionStrategy: LiveMigrate
networks:
- multus:
networkName: br-edge
name: nic-0
terminationGracePeriodSeconds: 180
volumes:
- dataVolume:
name: rhel-edge-server
name: rhel-edge-server
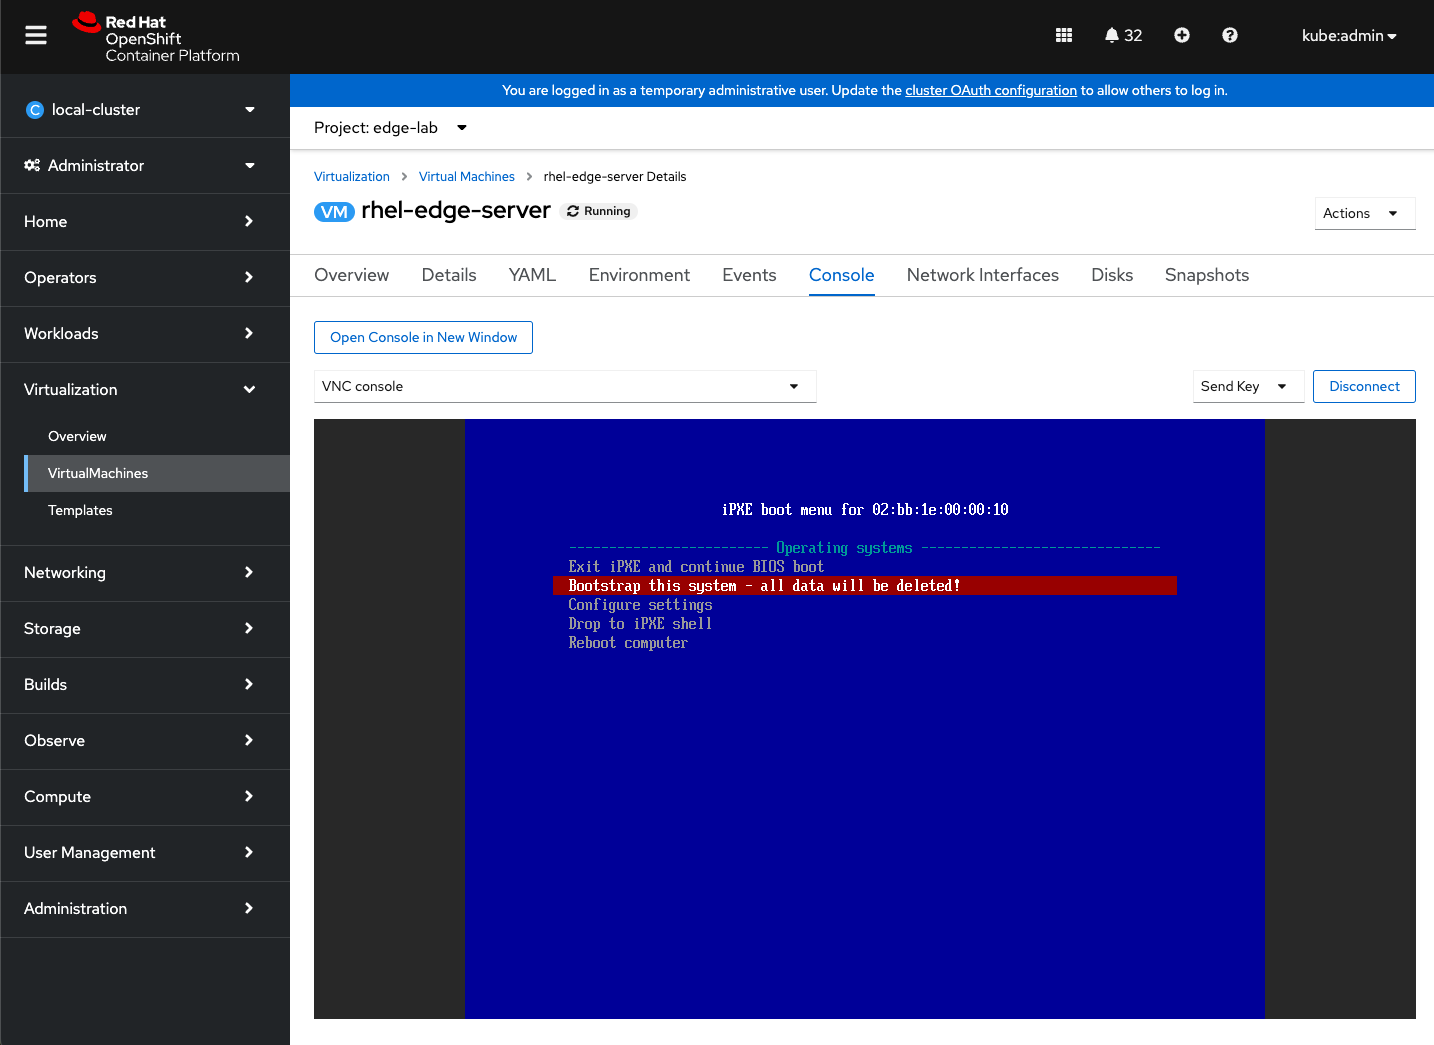
EOFOnce server is created and provisioned it will remain Stopped, start it and jump to the console. If everything is right you should see the following menu. Select Bootstrap this system… and have fun watching the bootstrap process 🙂
Accessing the edge server
You can access the edge-server you created and bootstraped either via OpenShift Virtualization console with the password or via SSH using ssh key you configured in the blueprint earlier. Because edge-server is connected to internal bridge on the SNO instance, you have to SSH to it from the edge-helper VM.
The easiest way to determine edge-server‘s IP address is to check DHCP leases at edge-helper VM.
[root@edge-helper ~]# cat /var/lib/dnsmasq/dnsmasq.leases
0 02:bb:1e:00:00:10 192.168.10.194 rhel-edge-server 01:02:bb:1e:00:00:10
Conclusion
In this first post about OCP-V and RHEL for Edge I demonstrated how to use OCP’s capabilities to run simple demo for virtualized RHEL for Edge lab. Stay tuned – in the next one I will show some more advanced topics around RHEL for Edge and OCP-V.