In my lab, I maintain a small, fully virtualized OpenShift environment to practice and demonstrate its capabilities – especially OpenShift Virtualization. A critical component of this setup is the storage backend. While Ceph-based OpenShift Data Foundation (ODF) is a great choice for OpenShift and OpenShift Virtualization, its resource requirements make it impractical for my ultra-small environment.
To address this, I sought a lightweight and simple storage solution that would still allow me to showcase most of OpenShift Virtualization’s advanced features. After discussing with colleagues (thanks Thibaut!), I realized that TrueNAS CORE – which I already use at home – could be a perfect fit! Even better, TrueNAS CORE can be integrated with Kubernetes and OpenShift using the CSI drivers from the democratic-csi project (https://github.com/democratic-csi/democratic-csi) and its easy-to-deploy Helm Charts (https://democratic-csi.github.io/charts/).
CSI (Container Storage Interface) drivers are used to integrate external storage solutions with the platform. They provide a standardized way for OpenShift to manage persistent storage across different storage backends. They allow to dynamically provision and manage persistent volumes (PVs), support native storage functions such like snapshots, expansions and cloning and work with various storage backends such like Ceph, NFS, iSCSI, FC, etc.
The benefit of using iSCSI and NFS in this lab is their familiarity to those experienced with traditional virtualization environments. This makes them especially valuable when showcasing OpenShift Virtualization to those exploring alternatives following the VMware/Broadcom changes.
Important Considerations
Before you jump in, keep these two things in mind:
- This setup is purely for learning and experimentation. It is not suitable for any production-like use cases, as it lacks essential security measures such as encryption and authentication. Many shortcuts were taken to get it up and running quickly.
- Neither TrueNAS CORE nor democratic-csi are officially certified or supported by Red Hat according to the Red Hat Ecosystem Catalog. So you’re at your own here.
You’ve been warned!
Understanding my setup – a simplified(?) environment diagram
To provide a clearer picture of my lab setup, let’s start with a simplified environment diagram. All nodes in this setup are fully virtualized, even though, as of writing, Red Hat does not officially support nested virtualization. While it works, it does so without official endorsement.
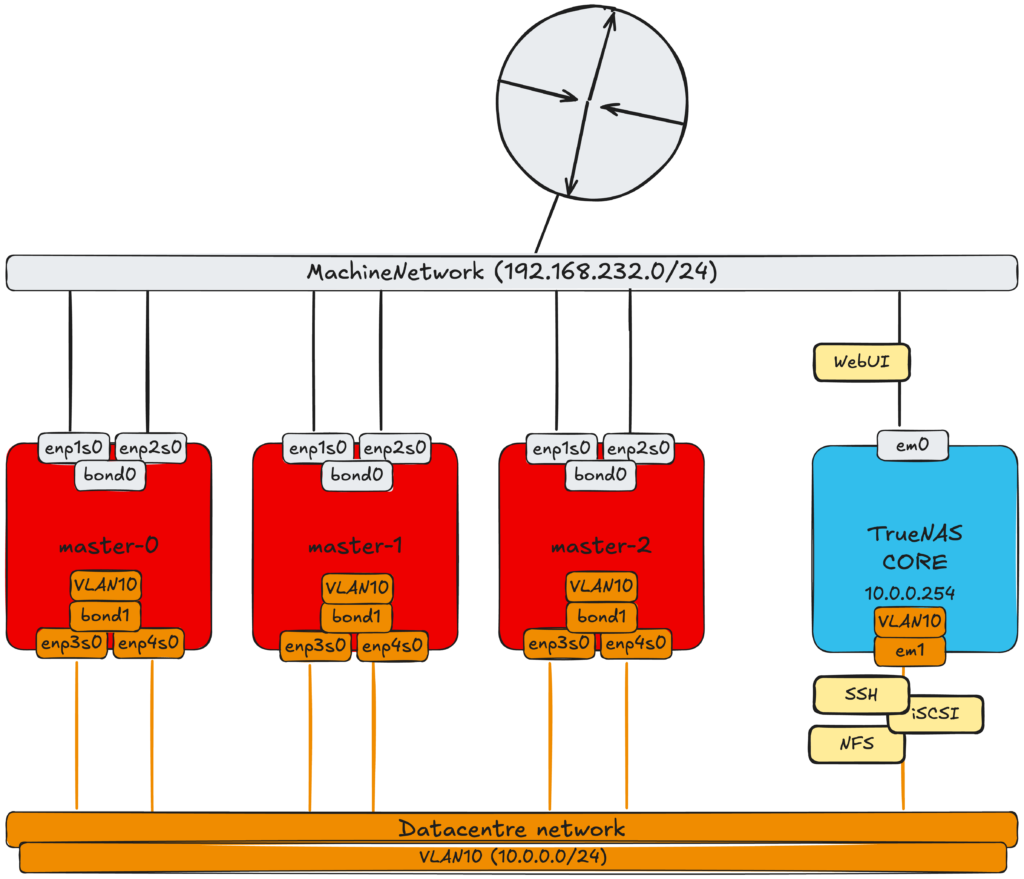
The environment consists of:
- A compact OpenShift cluster with three control plane nodes
- These nodes serve a dual purpose: they host both OpenShift’s control plane components and workloads.
- A separate TrueNAS CORE virtual machine
- This VM acts as the storage backend for the OpenShift cluster.
- Networking configuration
- Each OpenShift node is equipped with four virtual network interfaces (vNICs), forming two independent bonds:
- bond0: Assigned to the Machine Network (192.168.232.0/24), which serves as the default cluster network where the default PodNetwork is configured.
- bond1: Dedicated to Storage VLAN10 (10.0.0.0/24), ensuring storage traffic remains separate from regular cluster operations.
- The TrueNAS CORE VM has two vNICs connected to both networks:
- The Machine Network interface is used for WebUI management access.
- The Storage VLAN10 interface is used to provide storage services to the OpenShift cluster.
- Each OpenShift node is equipped with four virtual network interfaces (vNICs), forming two independent bonds:
- Installed OpenShift Operators:
- OpenShift Virtualization
- Kubernetes NMState Operator
With this setup in place, let’s explore how everything integrates and functions together.
OpenShift Cluster – storage network configuration
I need to configure VLAN 10 on bond1 for OpenShift nodes to ensure that storage traffic runs on a dedicated network, just as it would in a real-world scenario, preventing interference between OpenShift workloads and storage traffic.
I assume that bond1, VLAN 10, and the configuration for the enp3s0 and enp4s0 interfaces are not present on the nodes, allowing me to configure them directly using NodeNetworkConfigurationPolicy. Additionally, since VLAN 10 lacks a DHCP server, I must assign unique IP addresses to each node manually. The NNCP configuration files are as follows:
- extra-net.master-0.nncp.yml:
apiVersion: nmstate.io/v1
kind: NodeNetworkConfigurationPolicy
metadata:
  name: master-0-bond1-vlan10
spec:
  nodeSelector:
    kubernetes.io/hostname: "master-0"
  desiredState:
    interfaces:
      - name: bond1
        type: bond
        state: up
        link-aggregation:
          mode: active-backup
          options:
            primary: enp3s0
          port:
            - enp3s0
            - enp4s0
        ipv4:
          dhcp: false
          enabled: false
      - name: bond1.10
        type: vlan
        state: up
        vlan:
          base-iface: bond1
          id: 10
        ipv4:
          dhcp: false
          enabled: true
          address:
            - ip: 10.0.0.100
prefix-length: 24- extra-net.master-1.nncp.yml:
apiVersion: nmstate.io/v1
kind: NodeNetworkConfigurationPolicy
metadata:
  name: master-1-bond1-vlan10
spec:
  nodeSelector:
    kubernetes.io/hostname: "master-1"
  desiredState:
    interfaces:
      - name: bond1
        type: bond
        state: up
        link-aggregation:
          mode: active-backup
          options:
            primary: enp3s0
          port:
            - enp3s0
            - enp4s0
        ipv4:
          dhcp: false
          enabled: false
      - name: bond1.10
        type: vlan
        state: up
        vlan:
          base-iface: bond1
          id: 10
        ipv4:
          dhcp: false
          enabled: true
          address:
            - ip: 10.0.0.101
prefix-length: 24- extra-net.master-2.nncp.yml:
apiVersion: nmstate.io/v1
kind: NodeNetworkConfigurationPolicy
metadata:
  name: master-2-bond1-vlan10
spec:
  nodeSelector:
    kubernetes.io/hostname: "master-2"
  desiredState:
    interfaces:
      - name: bond1
        type: bond
        state: up
        link-aggregation:
          mode: active-backup
          options:
            primary: enp3s0
          port:
            - enp3s0
            - enp4s0
        ipv4:
          dhcp: false
          enabled: false
      - name: bond1.10
        type: vlan
        state: up
        vlan:
          base-iface: bond1
          id: 10
        ipv4:
          dhcp: false
          enabled: true
          address:
            - ip: 10.0.0.102
              prefix-length: 24
Once applied I verified if it was successful (spoiler warning: it was successful 😉 )
# oc get nnce
NAME                             STATUS      STATUS AGE   REASON
master-0.master-0-bond1-vlan10   Available   20s          SuccessfullyConfigured
master-1.master-1-bond1-vlan10   Available   20s          SuccessfullyConfigured
master-2.master-2-bond1-vlan10   Available   20s          SuccessfullyConfigured


# oc debug node/master-0
Temporary namespace openshift-debug-28lnr is created for debugging node...
Starting pod/master-0-debug-s6v8z ...
To use host binaries, run `chroot /host`
Pod IP: 192.168.232.100
If you don't see a command prompt, try pressing enter.


sh-5.1# ip -o link | grep bond1 ; ip -o addr | grep bond1.10
4: enp3s0: <BROADCAST,MULTICAST,SLAVE,UP,LOWER_UP> mtu 1450 qdisc fq_codel master bond1 state UP mode DEFAULT group default qlen 1000\    link/ether 52:54:00:c8:cb:00 brd ff:ff:ff:ff:ff:ff
5: enp4s0: <BROADCAST,MULTICAST,SLAVE,UP,LOWER_UP> mtu 1450 qdisc fq_codel master bond1 state UP mode DEFAULT group default qlen 1000\    link/ether 52:54:00:c8:cb:00 brd ff:ff:ff:ff:ff:ff permaddr 52:54:00:f7:27:97
544: bond1: <BROADCAST,MULTICAST,MASTER,UP,LOWER_UP> mtu 1500 qdisc noqueue state UP mode DEFAULT group default qlen 1000\    link/ether 52:54:00:c8:cb:00 brd ff:ff:ff:ff:ff:ff
545: bond1.10@bond1: <BROADCAST,MULTICAST,UP,LOWER_UP> mtu 1500 qdisc noqueue state UP mode DEFAULT group default qlen 1000\    link/ether 52:54:00:c8:cb:00 brd ff:ff:ff:ff:ff:ff
545: bond1.10    inet 10.0.0.100/24 brd 10.0.0.255 scope global noprefixroute bond1.10\       valid_lft forever preferred_lft forever
At this stage my OpenShift cluster is ready from the network configuration perspective so I can move to TrueNAS installation and configuration.
TrueNAS CORE installation and configuration
Installation of TrueNAS CORE is described in detail in the relevant documentation available here: https://www.truenas.com/docs/core/13.3/gettingstarted/install/. Just please note that for the sake of saving resources I’ve configured only single disk for data which is suboptimal configuration from the data redundancy point of view. TrueNAS will warn you about it during pool configuration process.
Getting ISO file with TrueNAS CORE installator
I have downloaded the ISO file with TrueNAS installator from https://www.truenas.com/download-truenas-core/ and saved it in /var/lib/libvirt/images/ folder on my host system where all virtual machines are running.
Creating virtual machine and installing TrueNAS CORE
I have created VM for TrueNAS using the following command. Please note that some of the parameters have to be modified accordingly to your environment, especially paths to qcow2 files, iso file and network configuration which in my case is based on OpenVSwitch.
# virt-install --name truenas \
--vcpus 2 \
--memory 8192 \
--memorybacking hugepages=on \
--disk size=16,bus=scsi,path=/home/VirtualMachines/truenas.qcow2 \
--disk size=256,bus=scsi,path=/home/VirtualMachines/truenas-data-0.qcow2 \
--cdrom /var/lib/libvirt/images/TrueNAS-13.3-U1.1.iso \
--network model=e1000,bridge=br-ovs-frontend,virtualport_type=openvswitch \
--network model=e1000,bridge=br-ovs-ctlplane,virtualport_type=openvswitch \
--os-variant freebsd13.1 \
--sound none \
--import \
--boot=hd,cdrom,network,menu=on \
--noreboot \
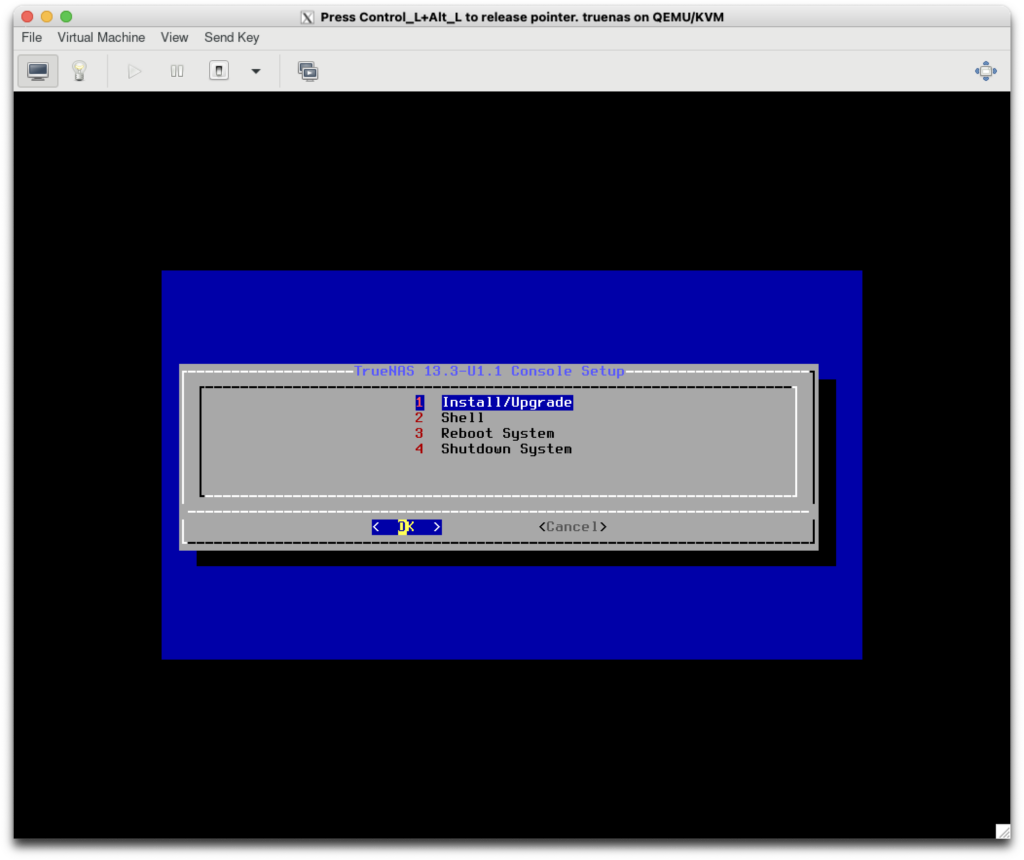
--noautoconsoleOnce created the VM should boot up and enter the installator – at this stage it can be only accessed through the VM console:
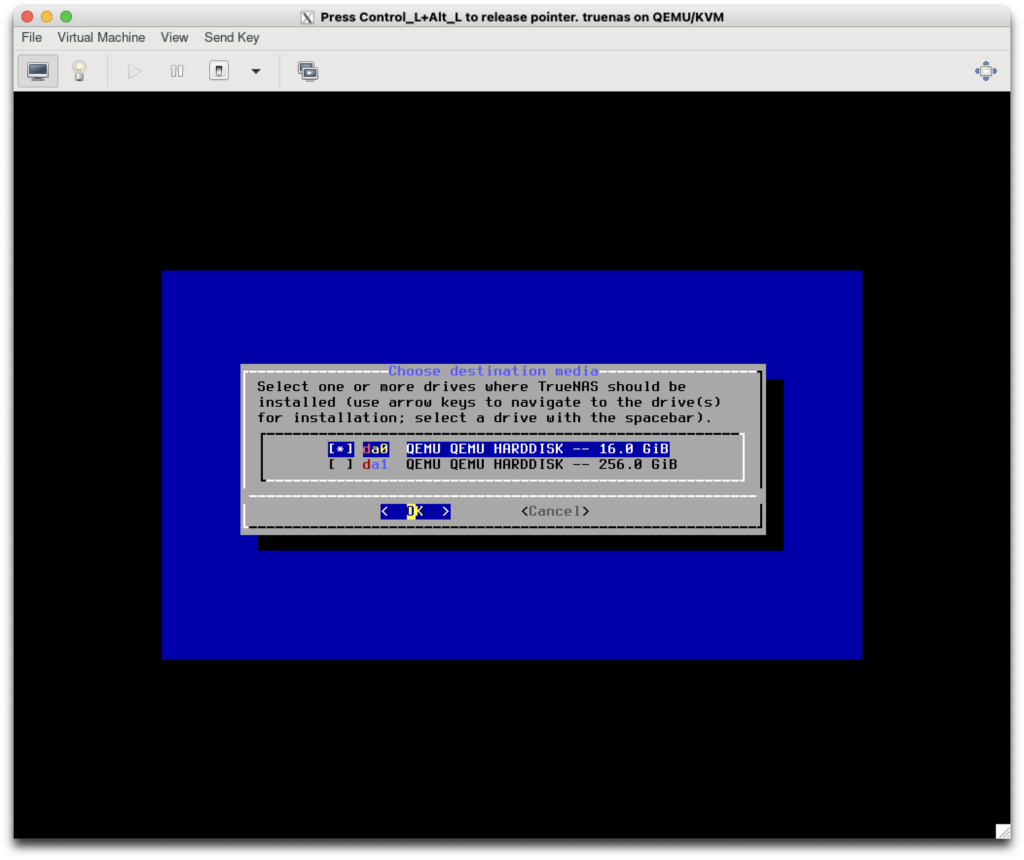
The installation process is pretty straightforward, just ensure the system is installed on the smaller disk as bellow since the big one will remain for data:
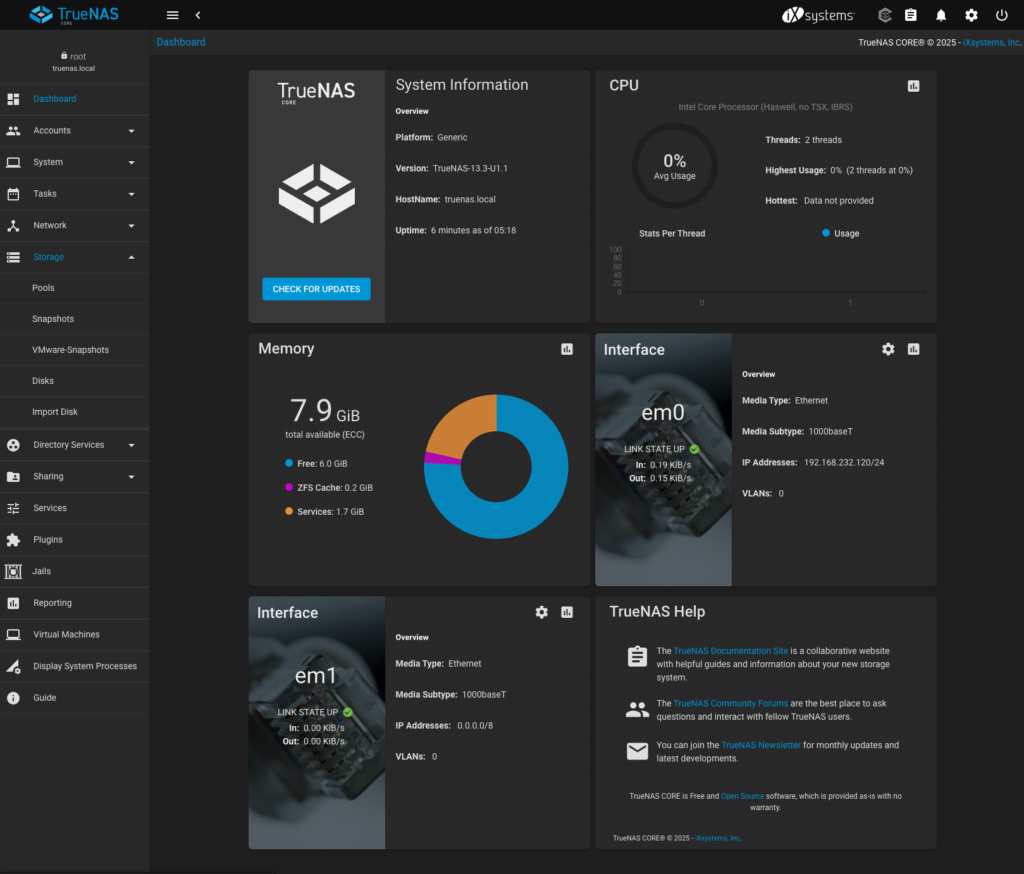
Since my MachineNetwork has DHCP configured to provide IP configuration, it was automatically picked up by TrueNAS:
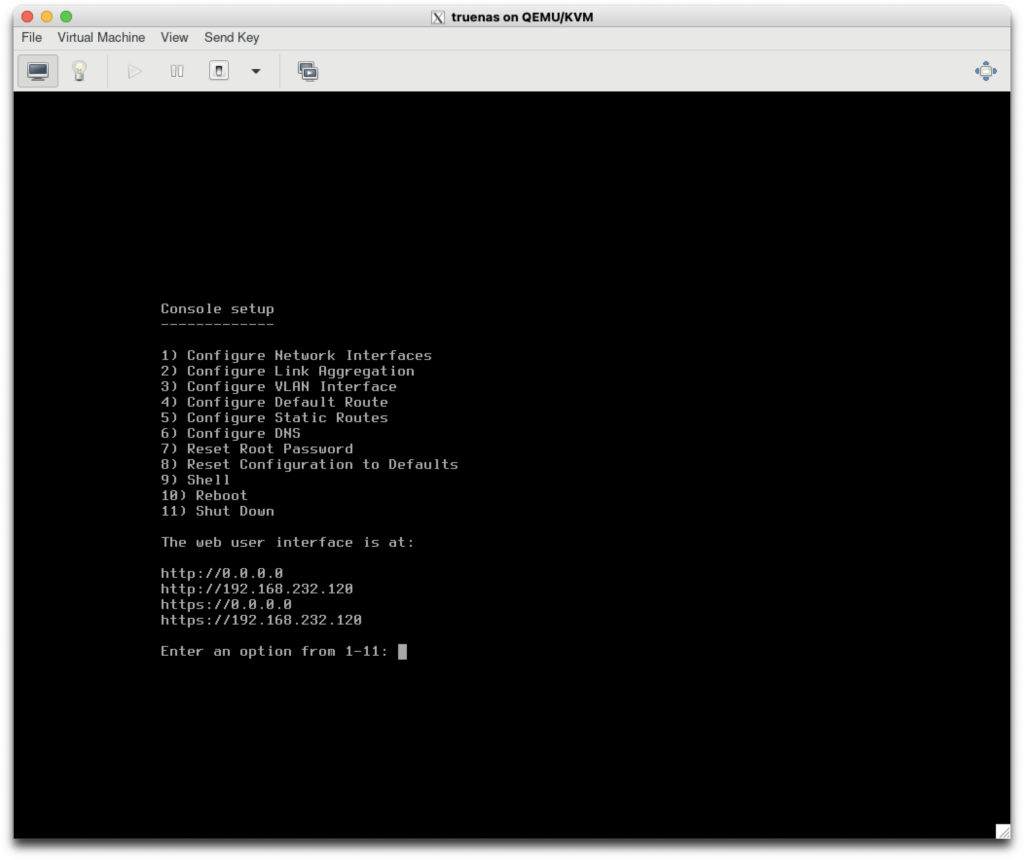
With that IP address I could immediately access TrueNAS CORE WebUI using credentials configured during installation:
TrueNAS CORE post installation configuration
Once I got TrueNAS CORE up and running I need to configure it further:
- Ensure storage VLAN 10 access and IP configuration
- Creation of storage pool shared with OpenShift cluster
- Configuration of storage sharing services: iSCSI, NFS
- Configuration of SSH and API access to TrueNAS CORE
Storage VLAN configuration
This is not really necessary as I could use MachineNetwork for storage configuration, however I do believe it is more realistic approach to get the dedicated network for this purpose. For that reason I need to configure TrueNAS to tag VLAN 10 over em1 interface. To do so I have to:
- Navigate to Network > Interfaces from the left hand side menu
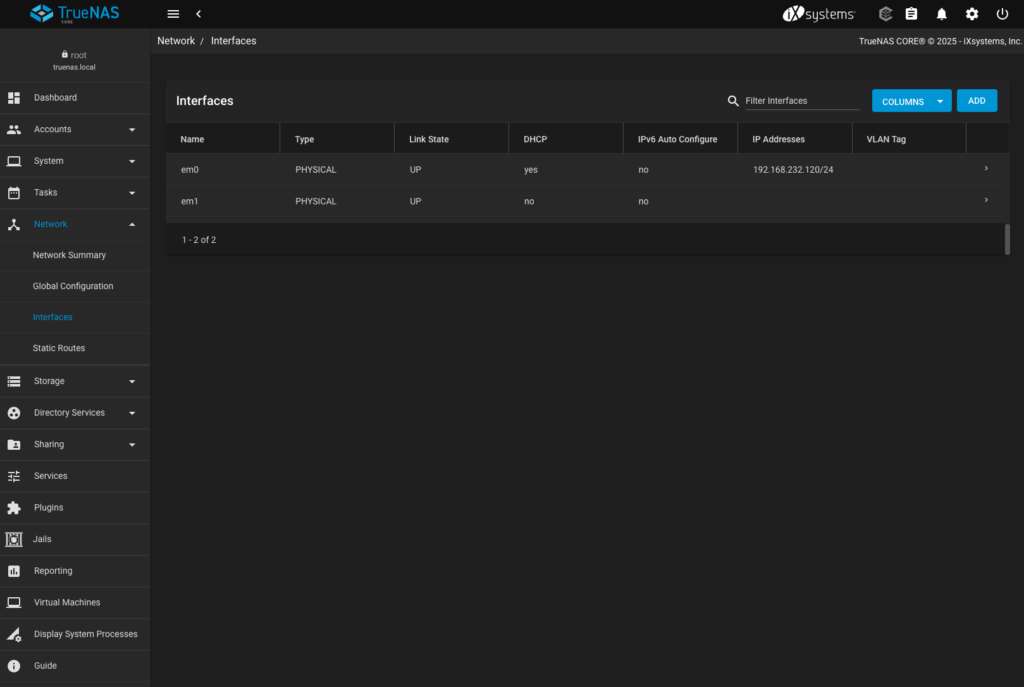
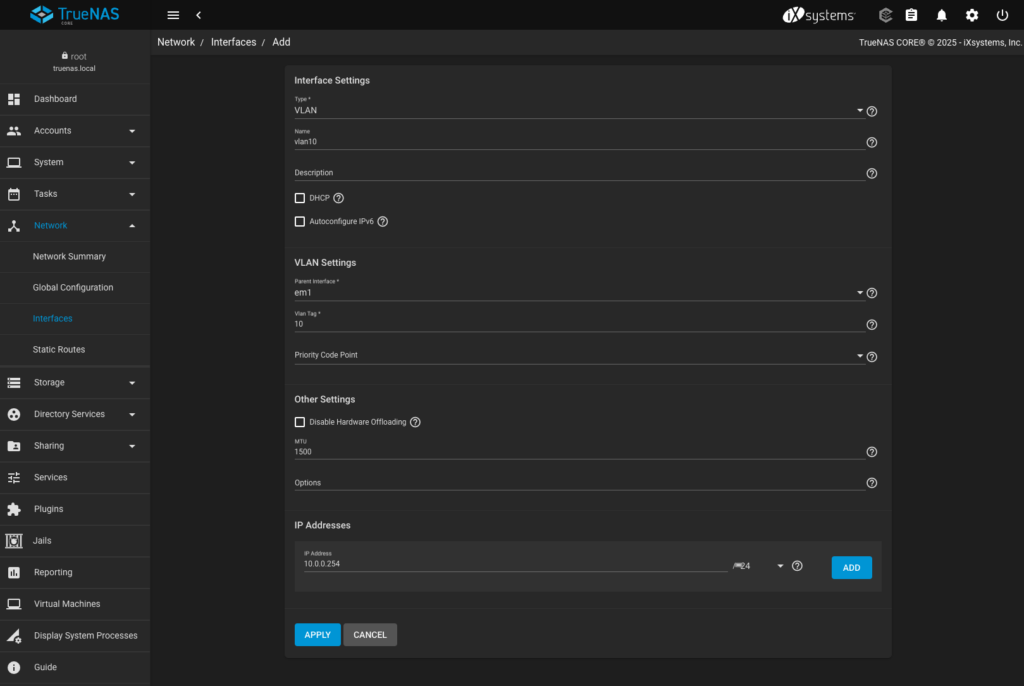
- press ADD to create new interface
- specify interface type as VLAN
- provide name of the interface (vlan10 in my case)
- specify parent interface (em1)
- specify VLAN tag (10)
- provide manually IP configuration (10.0.0.254/24)
- Test applied changes – TrueNAS will ensure you can maintain connectivity to it before making changes persistent. If not the changes will be automatically reverted
- Save the network configuration changes to ensure they will persist between reboots
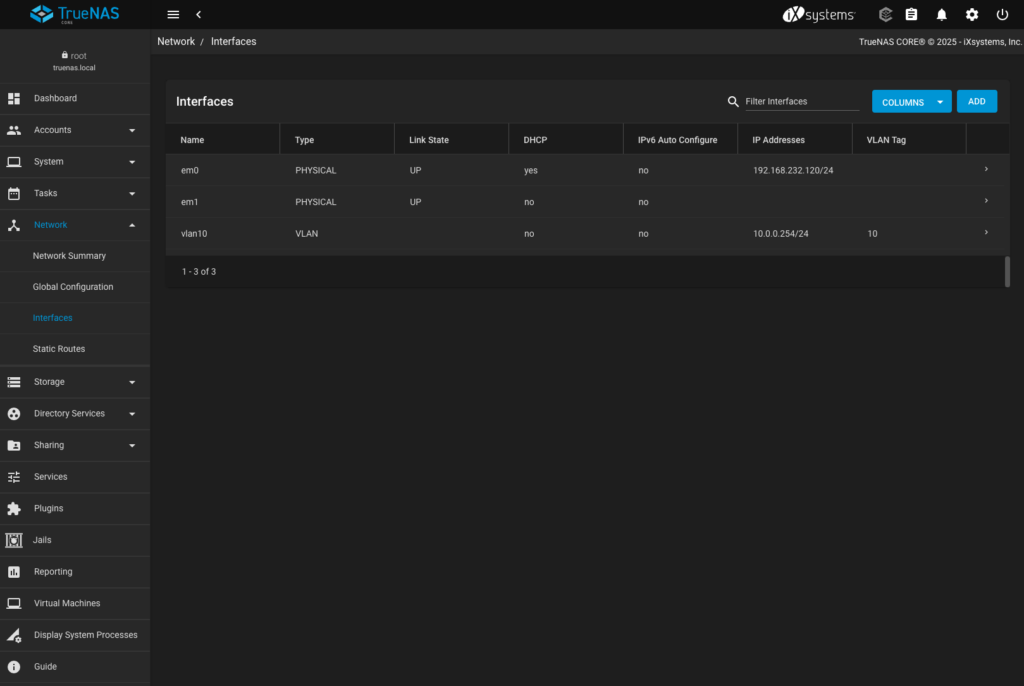
- Just in case – confirming that my OpenShift node can reach TrueNAS over VLAN 10 (spoiler alert: it does)
# oc debug node/master-1
Temporary namespace openshift-debug-xp5rn is created for debugging node...
Starting pod/master-1-debug-rrp4r ...
To use host binaries, run `chroot /host`
warning: Container container-00 is unable to start due to an error: Back-off pulling image "quay.io/openshift-release-dev/ocp-v4.0-art-dev@sha256:6ab858aed98e4fe57e6b144da8e90ad5d6698bb4cc5521206f5c05809f0f9296"
Pod IP: 192.168.232.101
If you don't see a command prompt, try pressing enter.


sh-5.1# ping -c 4 10.0.0.254
PING 10.0.0.254 (10.0.0.254) 56(84) bytes of data.
64 bytes from 10.0.0.254: icmp_seq=1 ttl=64 time=10.3 ms
64 bytes from 10.0.0.254: icmp_seq=2 ttl=64 time=1.86 ms
64 bytes from 10.0.0.254: icmp_seq=3 ttl=64 time=9.98 ms
64 bytes from 10.0.0.254: icmp_seq=4 ttl=64 time=0.450 ms

--- 10.0.0.254 ping statistics ---
4 packets transmitted, 4 received, 0% packet loss, time 3006ms
rtt min/avg/max/mdev = 0.450/5.643/10.277/4.515 ms
Storage pool configuration
In TrueNAS, storage pools are groups of physical disks combined into a single logical storage unit using ZFS. They provide redundancy, performance, and scalability by distributing data across multiple drives. In my case I have single drive only but the pool is still necessary to be created.
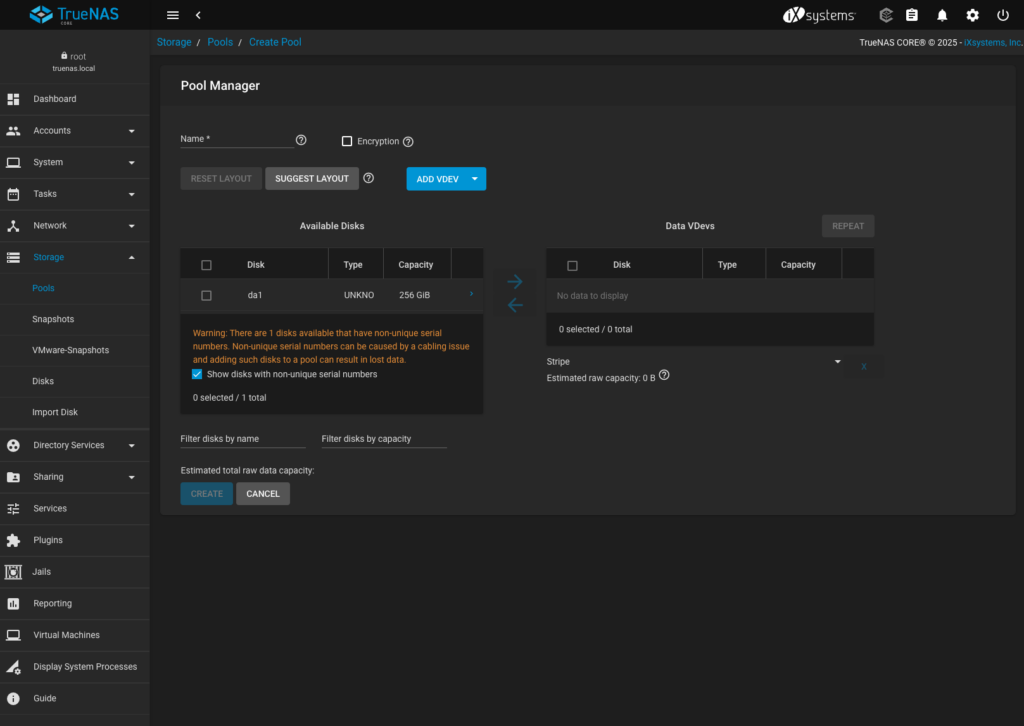
- To create a new pool, I got to Storage > Pools from the left hand side menu and clicked ADD. Selected Create new pool and clicked CREATE POOL to open the Pool Manager. Ignore the error and select “Show disks with non-unique serial numbers“
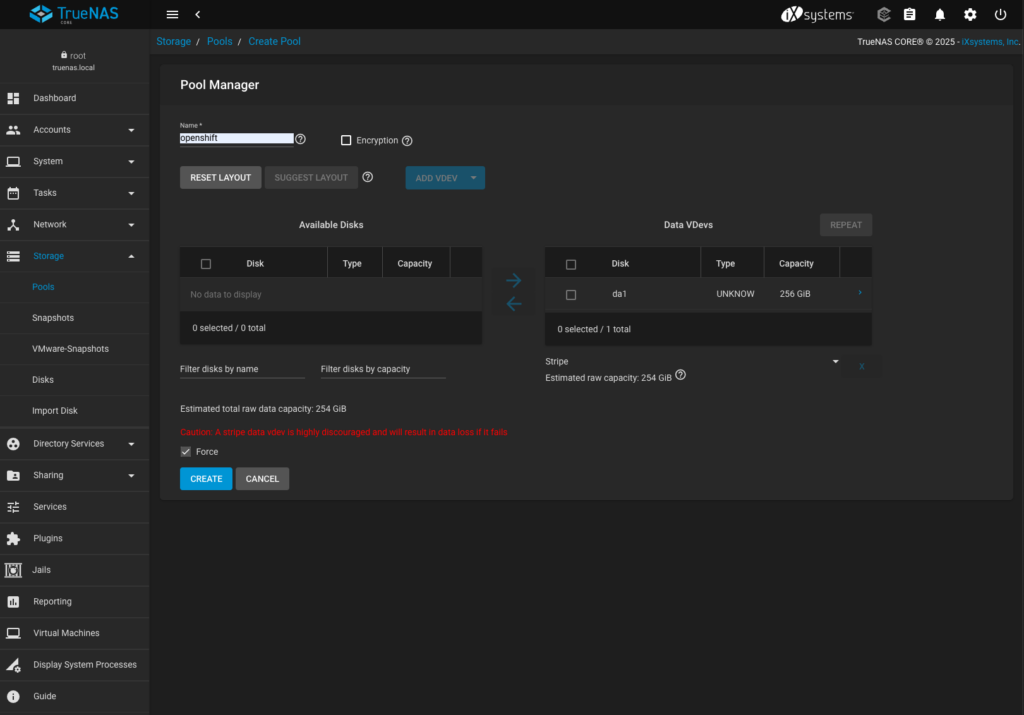
- Selected da1 disk which just occurred above and move it from Avilable Disks to Data VDevs column
- Selected box “Force” and acknowledged warning about stripe data
- Filled the name field for the pool (“openshift”) and clicked create
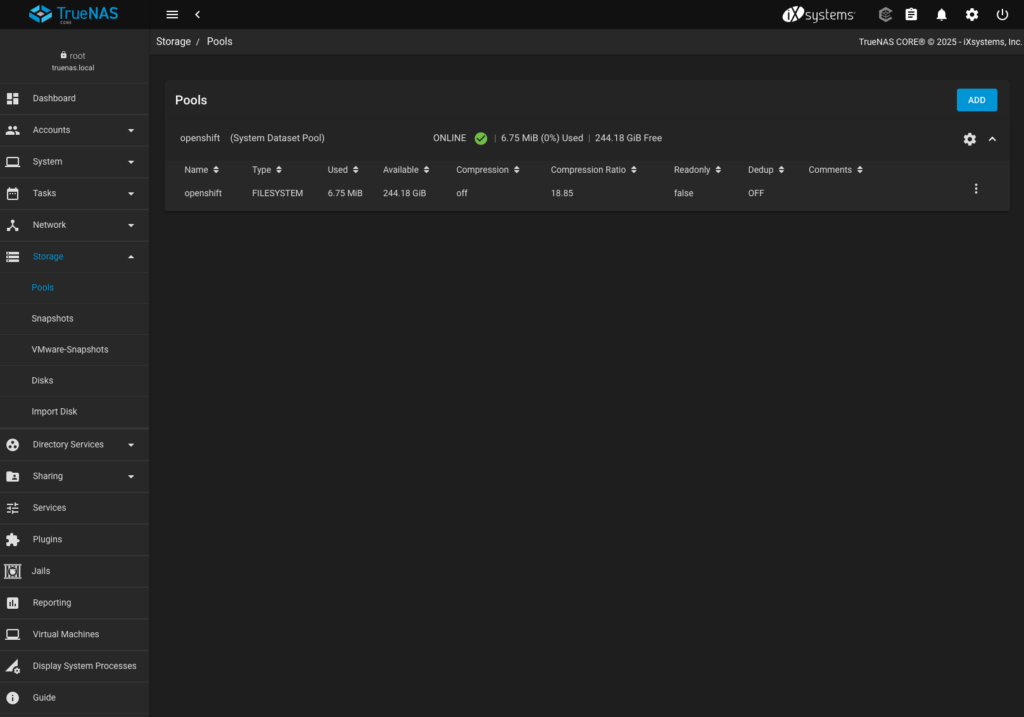
- Confirmed “The contents of all added disks will be erased.” warning
- Observed the pool being created.
- Optionally click three dots on the right, go to edit options and disable the default lz4 compression – this should save some CPU resources
Configuring iSCSI and NFS services on TrueNAS CORE
iSCSI (Internet Small Computer Systems Interface) is a block-level storage protocol that allows clients (initiators) to connect to storage devices (targets) over a network. On the other hand NFS (Network File System) is a file-level storage protocol that allows multiple clients to access shared files over a network. Among these two TrueNAS CORE can also support Apple Filing Protocol (AFP), Web-based Distributed Authoring and Versioning (WebDAV) and Server Message Block (SMB) but they’re out of the scope for this exercise.
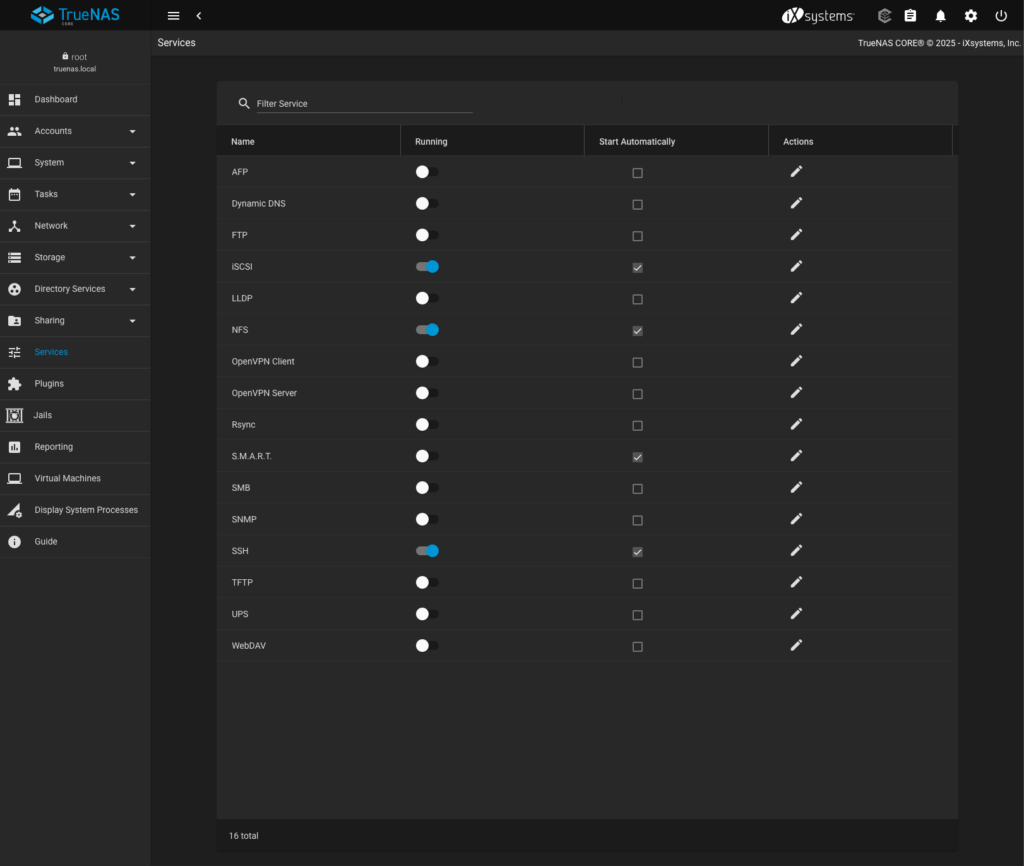
- To enable iSCSI and NFS I have to go to Services on the left hand side menu, make them running and started automatically. I also enabled SSH service as it will be needed later to provide management access for OpenShift.
iSCSI configuration
- To make OpenShift being able to connect to iSCSI I need to configure it a bit, therefore I can use either Actions / Pen symbol from this screen or navigate to Sharing > Block Shares (iSCSI) from the main menu. Both ways will take me to the same place where iSCSI protocol options are:
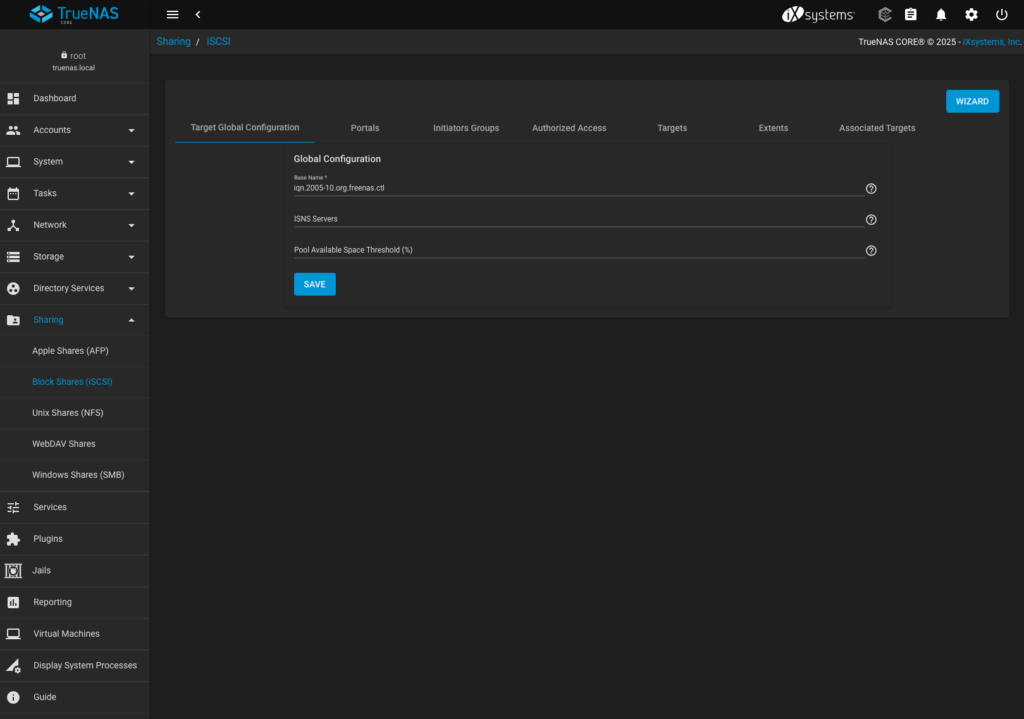
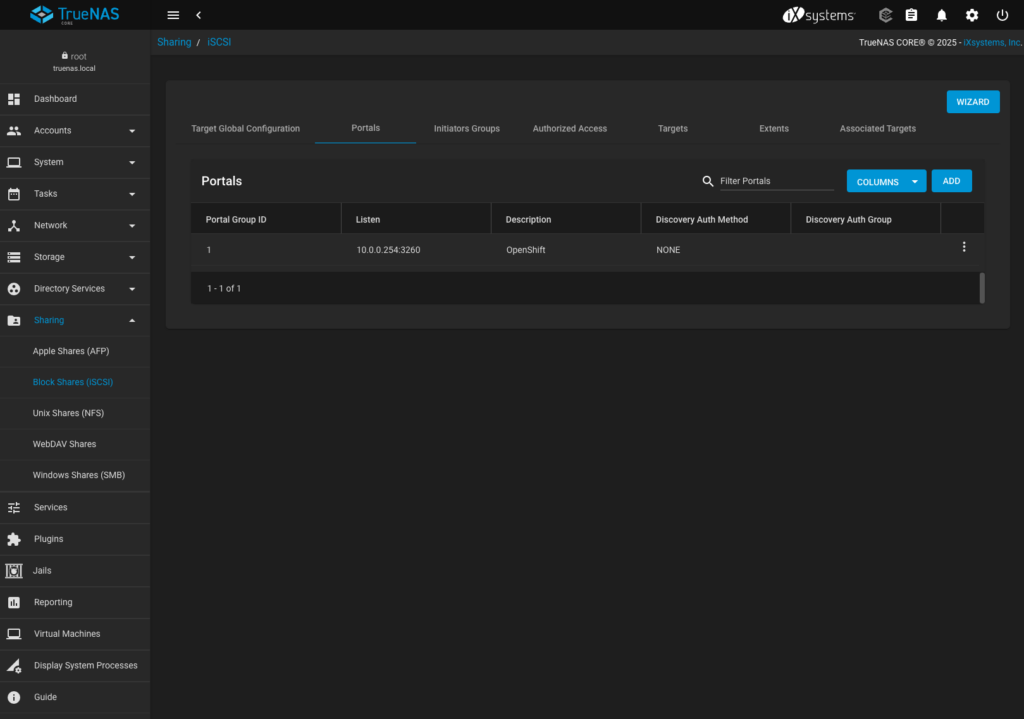
- I leave the defaults here and move to Portals tab where I add new endpoint that OpenShift can connect to, specyfing explicitly the Storage VLAN address to listen on (10.0.0.254). I don’t use any authentication method which probably would not be the best idea in a production environment.
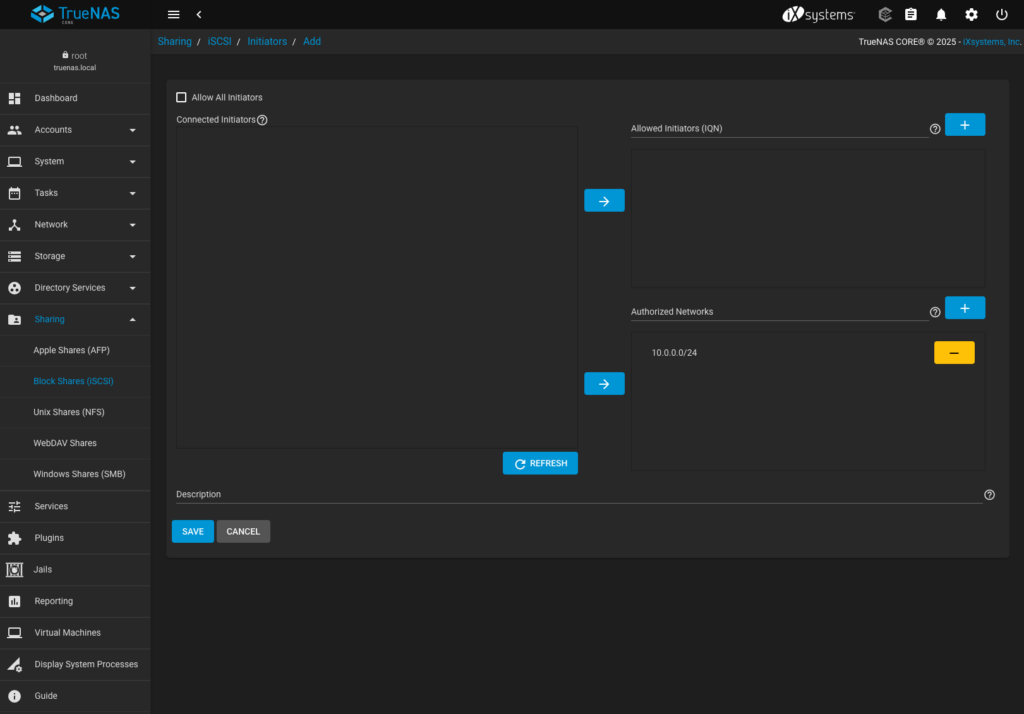
- Next I move to Initiators Groups tab where I can specify who can connect to iSCSI service. I could either allow all Initiators (clients) or specify them by name (IQN) or IP address. I’ve chosen the second option and allowed all 10.0.0.0/24 IPs to do connect:
NFS configuration
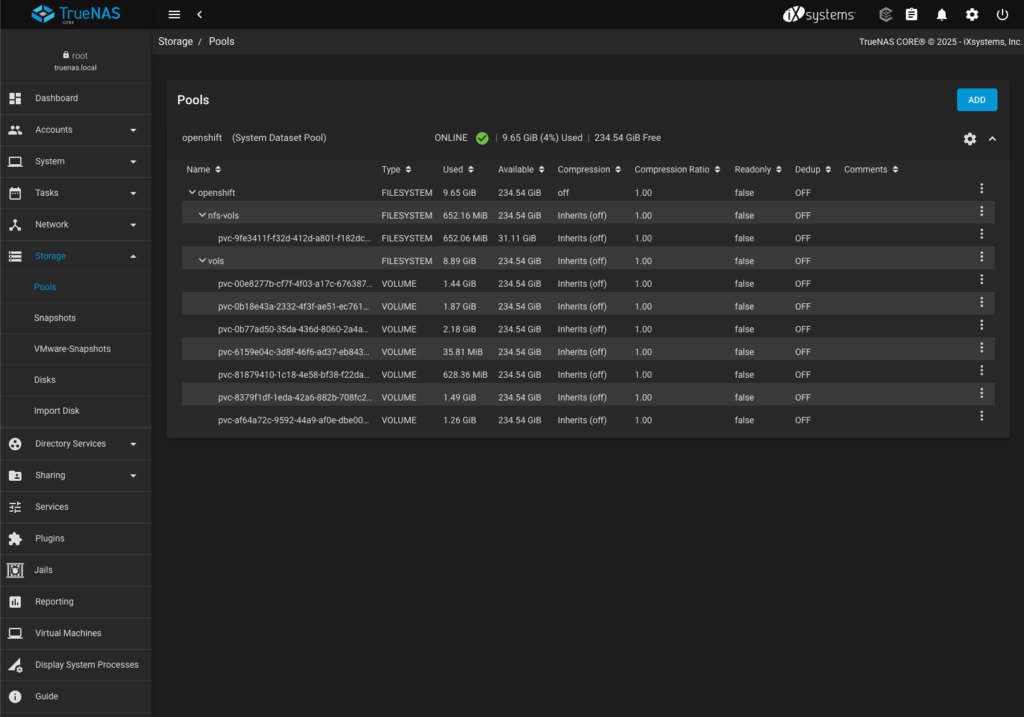
No specific NFS configuration is needed on the TrueNAS CORE side—it just needs to be enabled. The CSI drivers will automatically create DataSets as required, following the settings defined in the freenas-nfs.yaml configuration file mentioned later in this post. Below is a screenshot showing the openshift storage pool along with the nfs-vols and vols DataSets, which were created automatically during storage usage:
SSH access
Democratic-csi drivers needs both SSH and API access to manage storage resources provided by TrueNAS CORE. This probably isn’t the most elegant solution but for demo purposes it just works. Just as a side note, TrueNAS SCALE which is more modern version of TrueNAS CORE can be managed only using API, without a need to configure SSH access.
So I can configure SSH access either with login/password or login/ssh-key, the second is more appealing to me so I will generate new SSH key pair just for that purpose:
# ssh-keygen -f .ssh/ocp-truenas-csi
Generating public/private rsa key pair.
Enter passphrase (empty for no passphrase):
Enter same passphrase again:
Your identification has been saved in .ssh/ocp-truenas-csi
Your public key has been saved in .ssh/ocp-truenas-csi.pub
The key fingerprint is:
SHA256:xyz rafal@zyx
The key's randomart image is:
+---[RSA 3072]----+
| -.-||-.- |
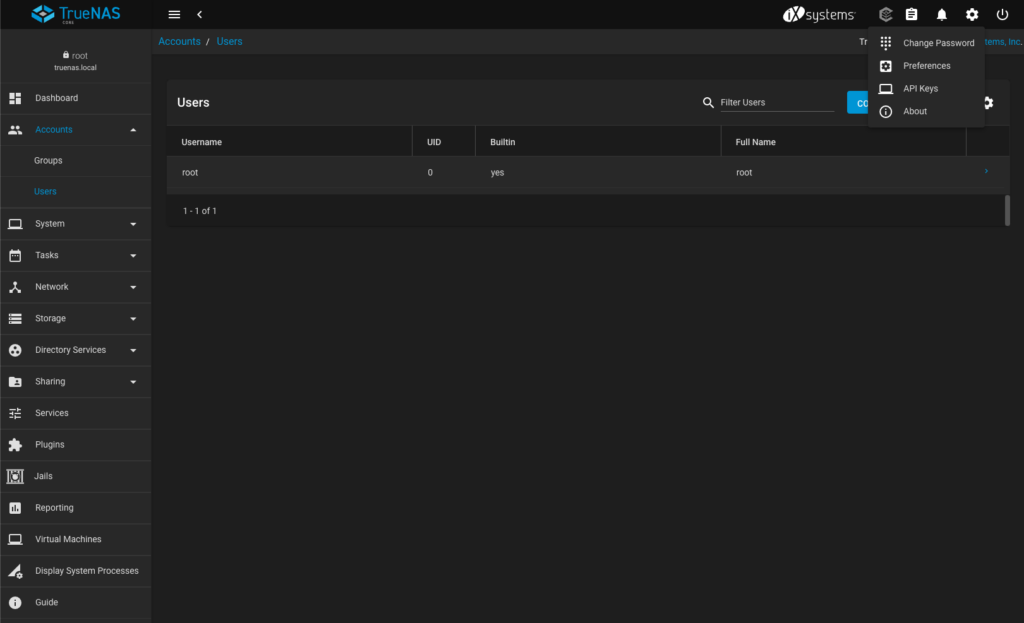
+----[SHA256]-----+I paste content of the public key (in my case stored as .ssh/ocp-truenas-csi.pub) to TrueNAS CORE root user by edditing it in Accounts > Users > root:

and confirming whether it work properly, just to safe some troubleshooting time later:
# ssh -i .ssh/ocp-truenas-csi root@192.168.232.120
FreeBSD 13.3-RELEASE-p4 n257491-41f6a830f8e TRUENAS

        TrueNAS (c) 2009-2025, iXsystems, Inc.
        All rights reserved.
        TrueNAS code is released under the modified BSD license with some
        files copyrighted by (c) iXsystems, Inc.

        For more information, documentation, help or support, go here:
        http://truenas.com
Welcome to TrueNAS
API access
To obtain API key from TrueNAS CORE to configure it with democratic-csi drivers I have to go to Settings by clicking the cog icon in the upper right screen corner, then selecting API Keys from the menu, pressing ADD and providing the name for the key. Please note that the key will be shown only once and I won’t be able to retrieve it again, so it is better to save it in safe place for the future use when configuring CSI drivers.
OpenShift CSI driver installation and configuration
In order to make OpenShift being able to automatically provision and manage storage resources from TrueNAS I need to install and configure CSI drivers. Fortunately it is quite easy as they’re provided as Helm Charts available from https://democratic-csi.github.io/charts/. Following instructions I have added them and upgraded my Helm repository:
# helm repo add democratic-csi https://democratic-csi.github.io/charts/
"democratic-csi" has been added to your repositories

# helm repo update
Hang tight while we grab the latest from your chart repositories...
...Successfully got an update from the "democratic-csi" chart repository
Update Complete. ⎈Happy Helming!⎈
iSCSI
To install the driver, I need to provide configuration files tailored to my environment. Fortunately, the Helm charts include several example files, available here: https://github.com/democratic-csi/charts/tree/master/stable/democratic-csi/examples. In my case, the most relevant example is freenas-iscsi.yaml. However, it’s important to note that the driver: section in this file is just a placeholder and lacks the necessary details for proper configuration.
To get the full set of options, I need to refer to the democratic-csi repository: https://github.com/democratic-csi/democratic-csi/tree/master/examples, where another freenas-iscsi.yaml file contains the required settings.
This part can be a bit confusing because the final configuration requires merging the contents of the second file into the driver: section of the first one to ensure everything is set up correctly. For my environment the following freenas-iscsi.yaml values file has been used:
csiDriver:
  name: "org.democratic-csi.iscsi"

storageClasses:
  - name: freenas-iscsi-csi
    defaultClass: true
    reclaimPolicy: Delete
    volumeBindingMode: Immediate
    allowVolumeExpansion: true
    parameters:
      fsType: xfs
    mountOptions: []
    secrets:
      provisioner-secret:
      controller-publish-secret:
      node-stage-secret:
      node-publish-secret:
      controller-expand-secret:

volumeSnapshotClasses:
  - name: freenas-iscsi-csi
    parameters:
    secrets:
      snapshotter-secret:

driver:
  config:
    driver: freenas-iscsi
    instance_id:
    httpConnection:
      protocol: http
      host: 10.0.0.254
      port: 80
      apiKey: "1-d ***SNIP*** aS2"
      allowInsecure: true
    sshConnection:
      host: 10.0.0.254
      port: 22
      username: root
      # use either password or key
      password: ""
      privateKey: |
        -----BEGIN OPENSSH PRIVATE KEY-----
        bAABBCCDDEEFFGGGHHIIJJKKLLMMNNOOPPQQQQRRRRSSSTTTUUVVXXXYYZZZZZZZZn
        *** SNIP ***
        qAABBCCDDEEFFGGGHHIIJJKKLLMMNNOOPPQQQQRRRRSSSTTTUUVVXXXYYZZZZZZZZ=
        -----END OPENSSH PRIVATE KEY-----
    zfs:
      datasetParentName: openshift/vols
      detachedSnapshotsDatasetParentName: openshift/snaps
      zvolCompression:
      zvolDedup:
      zvolEnableReservation: false
      zvolBlocksize:
    iscsi:
      targetPortal: "10.0.0.254:3260"
      targetPortals: []
      interface:
      namePrefix: csi-
      nameSuffix: "-clustera"

      targetGroups:
        - targetGroupPortalGroup: 1
          targetGroupInitiatorGroup: 1
          targetGroupAuthType: None
          targetGroupAuthGroup:

      extentInsecureTpc: true
      extentXenCompat: false
      extentDisablePhysicalBlocksize: true
      extentBlocksize: 512
      extentRpm: "SSD"
      extentAvailThreshold: 0

controller:
  hostNetwork: true
  enabled: true
  rbac:
    enabled: true
    openshift:
      # set to true if running on openshift *and* you have need
      # ie: hostNetwork, hostIPC, etc are turned on
      privileged: true

node:
  hostNetwork: true
  driver:
    localtimeHostPath: false
  rbac:
    enabled: true
    openshift:
      # set to true if running on openshift
      privileged: true
For detailed information on specific options, please refer to the example configuration files, which contain comments with explanations.
Now since I have all necessary bits I can run helm install to get democratic-csi drivers installed and configured to manage my TrueNAS CORE storage backend:
# helm upgrade --install --values freenas-iscsi.yaml --create-namespace --namespace democratic-csi zfs-iscsi democratic-csi/democratic-csi
Release "zfs-iscsi" does not exist. Installing it now.
NAME: zfs-iscsi
NAMESPACE: democratic-csi
STATUS: deployed
REVISION: 1
TEST SUITE: None
Just to verify that all containers are up and running and I got expected StorageClass and VolumeSnapshotClass created:
# oc -n democratic-csi get pods
NAME                                                   READY   STATUS    RESTARTS      AGE
zfs-iscsi-democratic-csi-controller-75bb6756d9-6ckpk   6/6     Running   3 (65s ago)   81s
zfs-iscsi-democratic-csi-node-cn9k6                    4/4     Running   0             81s
zfs-iscsi-democratic-csi-node-gq4fw                    4/4     Running   0             81s
zfs-iscsi-democratic-csi-node-xzggk                    4/4     Running   0             81s

# oc get sc
NAME                          PROVISIONER                    RECLAIMPOLICY   VOLUMEBINDINGMODE      ALLOWVOLUMEEXPANSION   AGE
freenas-iscsi-csi (default)   org.democratic-csi.iscsi       Delete          Immediate              true                   102s

# oc get volumesnapshotclasses.snapshot.storage.k8s.io
NAME                DRIVER                     DELETIONPOLICY   AGE
freenas-iscsi-csi   org.democratic-csi.iscsi   Delete           107s
It all seems good, even freenas-iscsi-csi StorageClass has been annotated as default one as requested (see defaultClass: true option in freenas-iscsi.yaml value file). This however won’t make it automatically working for OpenShift Virtualization aka CNV aka KubeVirt. It requires few additional tweaks.
First, I need to designate it as the default StorageClass for virtualization. To do this, I run the following commands – the first checks that no other StorageClass is already set as the default for virtualization, and the second applies the annotation:
# oc get sc -o json| jq '.items[].metadata|select(.annotations."storageclass.kubevirt.io/is-default-virt-class"=="true")|.name'

# oc annotate sc freenas-iscsi-csi storageclass.kubevirt.io/is-default-virt-class=true
storageclass.storage.k8s.io/freenas-iscsi-csi annotated
Second, I have to update StorageProfiles from cdi.kubevirt.io API as the default one does not contain information about access and volume modes and clone strategy:
# oc get storageprofiles.cdi.kubevirt.io freenas-iscsi-csi -o yaml
apiVersion: cdi.kubevirt.io/v1beta1
kind: StorageProfile
metadata:
  generation: 1
  labels:
    app: containerized-data-importer
    app.kubernetes.io/component: storage
    app.kubernetes.io/managed-by: cdi-controller
    app.kubernetes.io/part-of: hyperconverged-cluster
    app.kubernetes.io/version: 4.18.0
    cdi.kubevirt.io: ""
  name: freenas-iscsi-csi
  ownerReferences:
  - apiVersion: cdi.kubevirt.io/v1beta1
    blockOwnerDeletion: true
    controller: true
    kind: CDI
    name: cdi-kubevirt-hyperconverged
    uid: f5d44cad-c0dd-4c28-9e91-ba7bda1aba85
  resourceVersion: "56730175"
  uid: d56cada5-c5d2-47df-ab7e-00acb843e2f4
spec: {}
status:
  cloneStrategy: snapshot
  dataImportCronSourceFormat: pvc
  provisioner: org.democratic-csi.iscsi
  snapshotClass: freenas-iscsi-csi
  storageClass: freenas-iscsi-csi


# oc patch storageprofiles.cdi.kubevirt.io freenas-iscsi-csi --type=merge -p '{"spec":{"claimPropertySets":[{"accessModes":["ReadWriteMany","ReadWriteOnce"],"volumeMode":"Block"}]}}'
storageprofile.cdi.kubevirt.io/freenas-iscsi-csi patched

# oc get storageprofiles.cdi.kubevirt.io freenas-iscsi-csi -o yaml
apiVersion: cdi.kubevirt.io/v1beta1
kind: StorageProfile
metadata:
  generation: 3
  labels:
    app: containerized-data-importer
    app.kubernetes.io/component: storage
    app.kubernetes.io/managed-by: cdi-controller
    app.kubernetes.io/part-of: hyperconverged-cluster
    app.kubernetes.io/version: 4.18.0
    cdi.kubevirt.io: ""
  name: freenas-iscsi-csi
  ownerReferences:
  - apiVersion: cdi.kubevirt.io/v1beta1
    blockOwnerDeletion: true
    controller: true
    kind: CDI
    name: cdi-kubevirt-hyperconverged
    uid: f5d44cad-c0dd-4c28-9e91-ba7bda1aba85
  resourceVersion: "56793834"
  uid: d56cada5-c5d2-47df-ab7e-00acb843e2f4
spec:
  claimPropertySets:
  - accessModes:
    - ReadWriteMany
    - ReadWriteOnce
    volumeMode: Block
status:
  claimPropertySets:
  - accessModes:
    - ReadWriteMany
    - ReadWriteOnce
    volumeMode: Block
  cloneStrategy: snapshot
  dataImportCronSourceFormat: pvc
  provisioner: org.democratic-csi.iscsi
  snapshotClass: freenas-iscsi-csi
  storageClass: freenas-iscsi-csi
Shortly after I can observe that OpenShift Virtualization Operator is capable to request and allocate new PVCs to host the default VM images. This confirms that iSCSI based storage backend is configured and function properly.
# oc -n openshift-virtualization-os-images get pvc
NAME                                         STATUS    VOLUME                                     CAPACITY   ACCESS MODES   STORAGECLASS        VOLUMEATTRIBUTESCLASS   AGE
centos-stream10-52d45ea2052b                 Pending                                                                        freenas-iscsi-csi   <unset>                 53s
centos-stream9-a6374a5bf9f0                  Pending                                                                        freenas-iscsi-csi   <unset>                 53s
fedora-171f94e28cc8                          Bound     pvc-81879410-1c18-4e58-bf38-f22da8904c45   30Gi       RWO,RWX        freenas-iscsi-csi   <unset>                 53s
prime-33d88fa7-89a0-4743-9d92-ed4a6d081197   Bound     pvc-8379f1df-1eda-42a6-882b-708fc2e191fe   30Gi       RWO,RWX        freenas-iscsi-csi   <unset>                 52s
prime-4f58f2d3-5c0d-43ee-97dc-b0422fe70093   Bound     pvc-00e8277b-cf7f-4f03-a17c-676387aaa0e4   30Gi       RWO,RWX        freenas-iscsi-csi   <unset>                 53s
prime-8aa74bbe-7755-4ddf-b152-9c928ff54a4f   Bound     pvc-0b77ad50-35da-436d-8060-2a4a5d133bf0   30Gi       RWO,RWX        freenas-iscsi-csi   <unset>                 52s
prime-b70fad6d-3668-4aee-b652-8d761bd9a93f   Bound     pvc-af64a72c-9592-44a9-af0e-dbe00b3fd29e   30Gi       RWO,RWX        freenas-iscsi-csi   <unset>                 52s
prime-bb2b9f06-2f06-46e4-bca5-fe26636c37c7   Bound     pvc-0b18e43a-2332-4f3f-ae51-ec76135ca1c6   30Gi       RWO,RWX        freenas-iscsi-csi   <unset>                 53s
rhel10-beta-8a0eb850f419                     Pending                                                                        freenas-iscsi-csi   <unset>                 52s
rhel8-257b1af2a7f6                           Pending                                                                        freenas-iscsi-csi   <unset>                 52s
rhel9-dd6a5c9fb09e                           Pending                                                                        freenas-iscsi-csi   <unset>                 52s


[root@bastion ~]# oc -n openshift-virtualization-os-images get pvc
NAME                           STATUS   VOLUME                                     CAPACITY   ACCESS MODES   STORAGECLASS        VOLUMEATTRIBUTESCLASS   AGE
centos-stream10-52d45ea2052b   Bound    pvc-00e8277b-cf7f-4f03-a17c-676387aaa0e4   30Gi       RWO,RWX        freenas-iscsi-csi   <unset>                 5m
centos-stream9-a6374a5bf9f0    Bound    pvc-0b18e43a-2332-4f3f-ae51-ec76135ca1c6   30Gi       RWO,RWX        freenas-iscsi-csi   <unset>                 5m
fedora-171f94e28cc8            Bound    pvc-81879410-1c18-4e58-bf38-f22da8904c45   30Gi       RWO,RWX        freenas-iscsi-csi   <unset>                 6m
rhel10-beta-8a0eb850f419       Bound    pvc-af64a72c-9592-44a9-af0e-dbe00b3fd29e   30Gi       RWO,RWX        freenas-iscsi-csi   <unset>                 7m
rhel8-257b1af2a7f6             Bound    pvc-0b77ad50-35da-436d-8060-2a4a5d133bf0   30Gi       RWO,RWX        freenas-iscsi-csi   <unset>                 9m
rhel9-dd6a5c9fb09e             Bound    pvc-8379f1df-1eda-42a6-882b-708fc2e191fe   30Gi       RWO,RWX        freenas-iscsi-csi   <unset>                 12m
NFS
Configuration of NFS protocol with democratic-csi and TrueNAS CORE is very similar to what I’ve done with iSCSI. First of all I need to create values file – freenas-nfs.yaml – with proper configuration. In my case it looks as follow:
csiDriver:
  name: "org.democratic-csi.nfs"
  fsGroupPolicy: File

storageClasses:
  - name: freenas-nfs-csi
    defaultClass: false
    reclaimPolicy: Delete
    volumeBindingMode: Immediate
    allowVolumeExpansion: true
    parameters:
      fsType: nfs
    mountOptions:
      - noatime
      - nfsvers=3
    secrets:
      provisioner-secret:
      controller-publish-secret:
      node-stage-secret:
      node-publish-secret:
      controller-expand-secret:

volumeSnapshotClasses:
  - name: freenas-nfs-csi
    parameters:
    secrets:
      snapshotter-secret:

driver:
  config:
    driver: freenas-nfs
    instance_id:
    httpConnection:
      protocol: http
      host: 10.0.0.254
      port: 80
      apiKey: "1-d ***SNIP*** aS2"
      username: root
      password: ""
      allowInsecure: true
    sshConnection:
      host: 10.0.0.254
      port: 22
      username: root
      password: ""
      privateKey: |
        -----BEGIN OPENSSH PRIVATE KEY-----
        bAABBCCDDEEFFGGGHHIIJJKKLLMMNNOOPPQQQQRRRRSSSTTTUUVVXXXYYZZZZZZZZn
        *** SNIP ***
        qAABBCCDDEEFFGGGHHIIJJKKLLMMNNOOPPQQQQRRRRSSSTTTUUVVXXXYYZZZZZZZZ=
        -----END OPENSSH PRIVATE KEY-----
    zfs:
      datasetParentName: openshift/nfs-vols
      detachedSnapshotsDatasetParentName: openshift/nfs-snaps
      datasetEnableQuotas: true
      datasetEnableReservation: false
      datasetPermissionsMode: "0777"
      datasetPermissionsUser: 0
      datasetPermissionsGroup: 0
    nfs:
      shareHost: 10.0.0.254
      shareAlldirs: false
      shareAllowedHosts: []
      shareAllowedNetworks: []
      shareMaprootUser: root
      shareMaprootGroup: wheel
      shareMapallUser: ""
      shareMapallGroup: ""

controller:
  hostNetwork: true
  enabled: true
  rbac:
    enabled: true
    openshift:
      # set to true if running on openshift *and* you have need
      # ie: hostNetwork, hostIPC, etc are turned on
      privileged: true

node:
  hostNetwork: true
  driver:
    localtimeHostPath: false
  rbac:
    enabled: true
    openshift:
      # set to true if running on openshift
      privileged: true
Once file is ready I can run helm install, please note I must use different deployment name – zfs-nfs:
# helm upgrade --install --values freenas-nfs.yaml --create-namespace --namespace democratic-csi zfs-nfs democratic-csi/democratic-csi
Release "zfs-nfs" does not exist. Installing it now.
NAME: zfs-nfs
NAMESPACE: democratic-csi
STATUS: deployed
REVISION: 1
TEST SUITE: None
Just to quickly verify if the new pods for NFS have been created:
# oc get pods -n democratic-csi
NAME                                                   READY   STATUS    RESTARTS        AGE
zfs-iscsi-democratic-csi-controller-75bb6756d9-6ckpk   6/6     Running   3 (18h ago)     18h
zfs-iscsi-democratic-csi-node-cn9k6                    4/4     Running   0               18h
zfs-iscsi-democratic-csi-node-gq4fw                    4/4     Running   0               18h
zfs-iscsi-democratic-csi-node-xzggk                    4/4     Running   0               18h
zfs-nfs-democratic-csi-controller-684dfc4d9-4d22h      6/6     Running   3 (18m ago)     18m
zfs-nfs-democratic-csi-node-47cvn                      4/4     Running   0                6m
zfs-nfs-democratic-csi-node-9cnmm                      4/4     Running   0                6m
zfs-nfs-democratic-csi-node-xh5jf                      4/4     Running   0                6m
And similarly to what I did for iSCSI StorageProfile, I need to patch freenas-nfs-csi StorageProfile as well and set accessModes and volumeMode:
# oc patch storageprofiles.cdi.kubevirt.io freenas-nfs-csi --type=merge -p '{"spec":{"claimPropertySets":[{"accessModes":["ReadWriteMany","ReadWriteOnce"],"volumeMode":"Filesystem"}]}}'
storageprofile.cdi.kubevirt.io/freenas-nfs-csi patched
From this moment I can use NFS based volumes provided by TrueNAS CORE for OpenShift workloads, including virtual machines 🙂
Troubleshooting
In case something isn’t right or I want to dig deeper into what’s underneath, the very first steps for troubleshooting are:
- Check logs of pods in democratic-csi project, especially *-democratic-csi-controller-* pod
- Check events in openshift-virtualization-os-images project, to see why images are not being downloaded:
# oc -n openshift-virtualization-os-images get events -w - Check events in the project where resources were supposed to be created. Below example of events list which were thrown due to lack of accessMode and volumeMode configuration in StorageProfile freenas-nfs-csi
# oc -n default get events
LAST SEEN   TYPE      REASON                       OBJECT                                   MESSAGE
10m         Normal    Modified                     networkaddonsconfig/cluster              Config spec was modified
107s        Warning   ErrClaimNotValid             datavolume/fedora-beige-loon-39-volume   Spec is missing accessMode and volumeMode, cannot get access mode from StorageProfile freenas-nfs-csi
3m39s       Normal    ErrClaimNotValid             datavolume/fedora-beige-loon-39-volume   no accessMode specified in StorageProfile freenas-nfs-csi
3m39s       Normal    SuccessfulDataVolumeCreate   virtualmachine/fedora-beige-loon-39      Created DataVolume fedora-beige-loon-39-volume
Summary
In this blog post I’ve outlined a method for setting up a compact OpenShift environment using TrueNAS CORE as the storage backend. This approach offers a resource-efficient alternative to more demanding storage solutions like Ceph-based OpenShift Data Foundation (ODF), making it suitable for small-scale labs and experimentation.
By integrating TrueNAS CORE with OpenShift using the democratic-csi project’s CSI drivers and Helm Charts, this lab setup provides a lightweight and straightforward storage solution. It enables users to explore and demonstrate OpenShift Virtualization’s advanced features without the overhead of more resource-intensive storage systems.